How to add a dummy (fake) printer?
Installing a dummy (fake) printer can be beneficial to access outdated software that is no longer compatible with the latest series of our printers. Additionally, it can often be used for various testing methods if you experience printer installation issues. This can be performed on both Windows and macOS operating systems. Please keep in mind that these steps may change with future OS releases.
Please select your operating system:
Please click on the version of your operating system for the appropriate steps.


Adding a dummy printer on Windows 10:
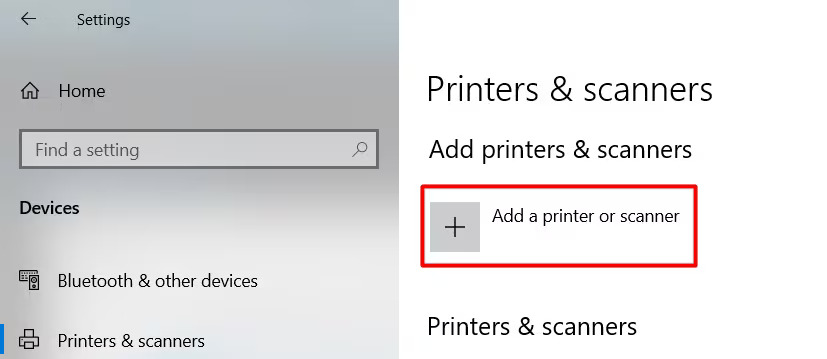
1. Use the Windows search to look for ‘Printers & Scanners’.
2. Choose ‘Add a printer or scanner’.
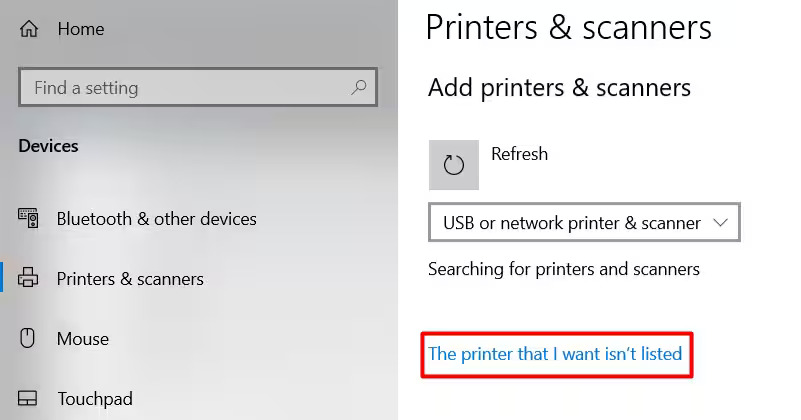
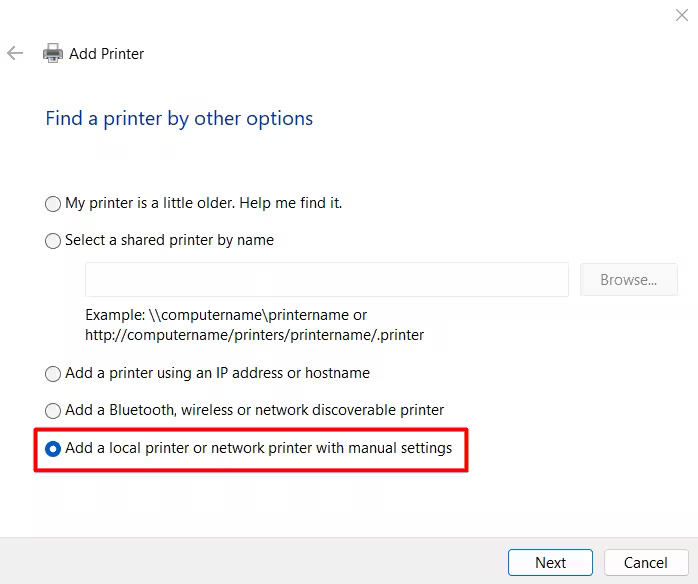
4. Select the last option which should be ‘Add a local printer or network printer with manual settings’.

5. On the next screen you can keep all options as default. The existing port should be selected with the drop-down set to LPT1: (Printer Port).
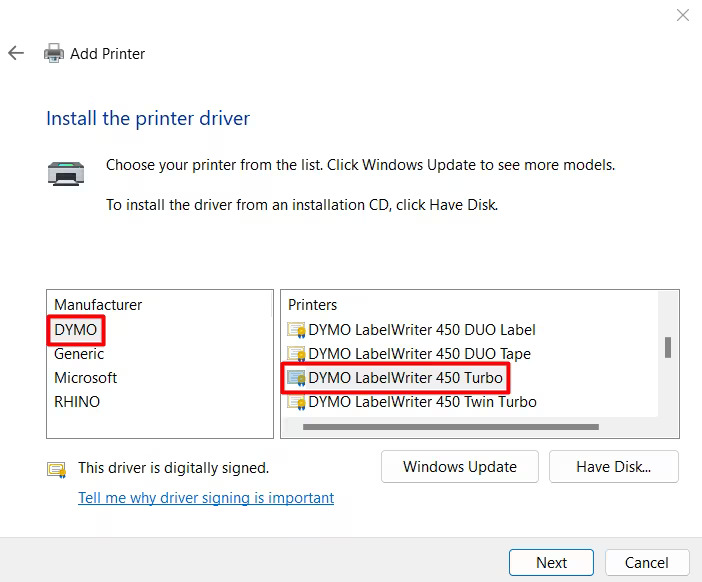
6. Select DYMO as the manufacturer and proceed to select your desired printer from the list on the right-hand side.

7. Proceed with the rest of the setup. No further changes are required.
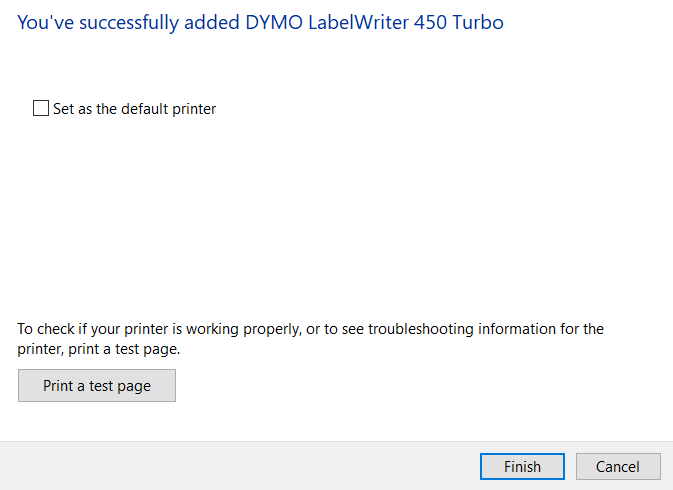
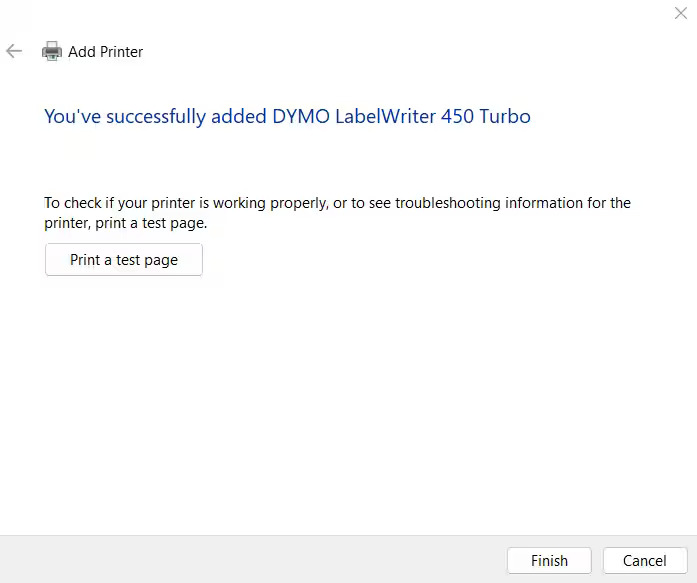
8. At the end you should receive a successful message. Your dummy printer has now been installed and you can finish the printer install wizard.
Adding a dummy printer on Windows 11:
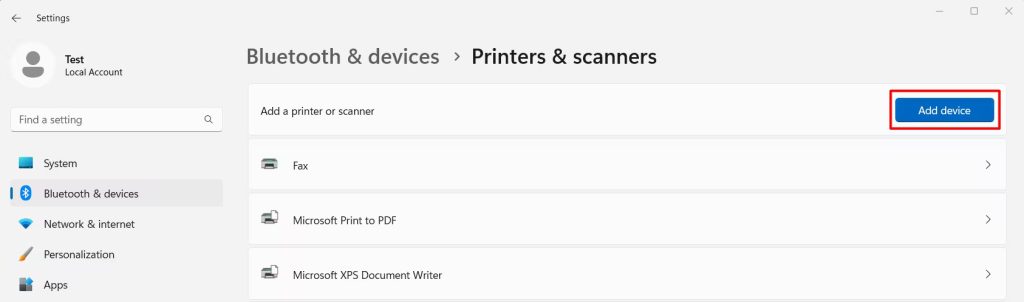
1. Use the Windows search to look for ‘Printers & Scanners’.
2. Select ‘Add device’.
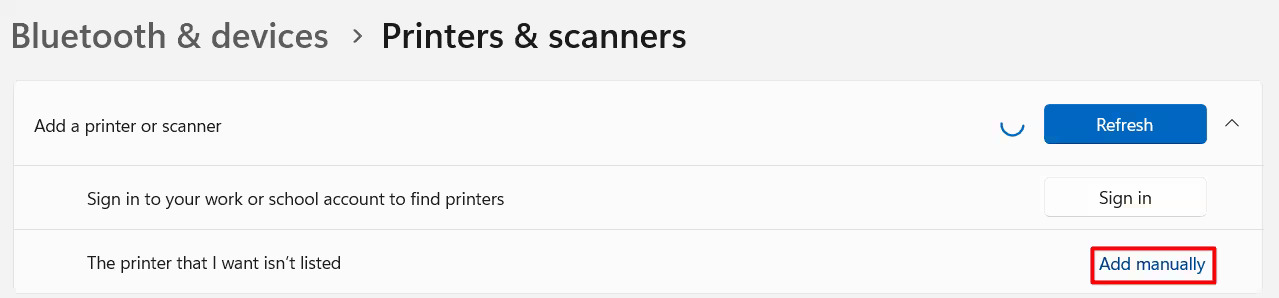
3. An option for ‘The printer that I want isn’t listed’ should appear. Select ‘Add manually’.
4. Select the last option which should be ‘Add a local printer or network printer with manual settings’.
5. On the next screen you can keep all options as default. The existing port should be selected with the drop-down set to LPT1: (Printer Port).
6. Select DYMO as the manufacturer and proceed to select your desired printer from the list on the right-hand side.
7. Proceed with the rest of the setup. No further changes are required.
8. At the end you should receive a successful message. Your dummy printer has now been installed and you can finish the printer install wizard.
Please click on the version of your operating system for the appropriate steps.


Adding a dummy printer on macOS Monterey and earlier:
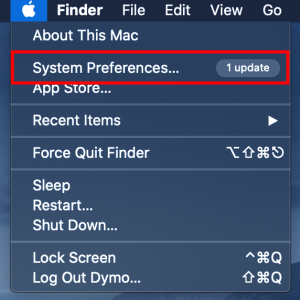
1. Navigate to the Apple icon and select ‘System Preferences’.
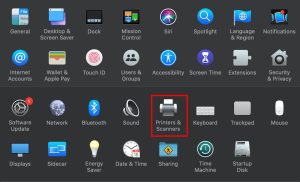
2. From the menu, select ‘Printers & Scanners’.
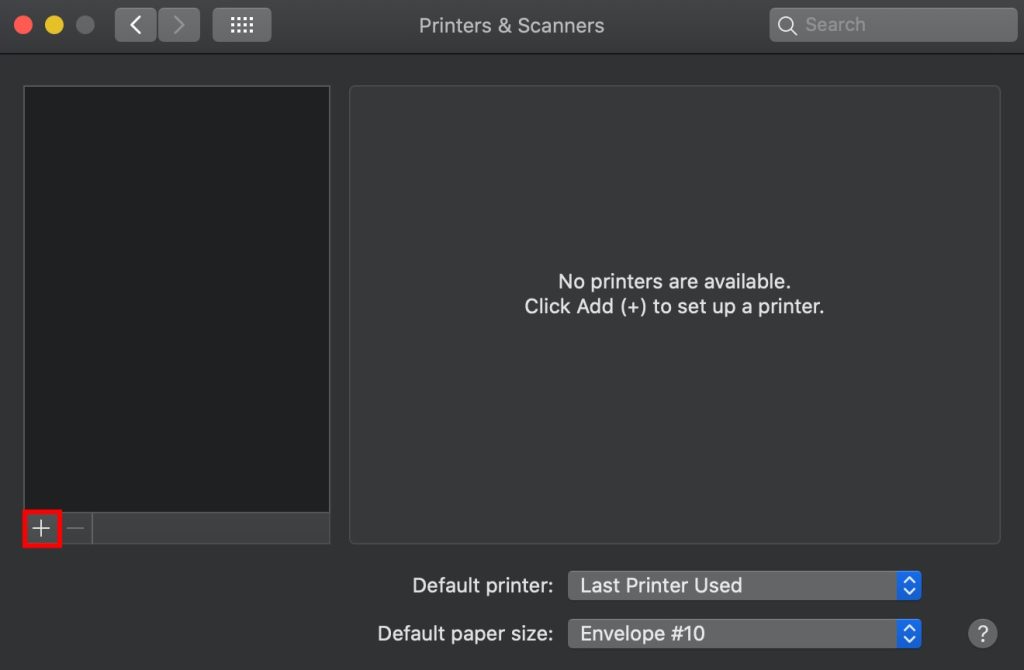
3. Select the + sign to add a printer.
4. Select the IP tab at the top of the window.
5. In the Address field, type a number. It does not matter what number you type.
6. In the Name field, type in the name of your printer. This will be the name the dummy printer is displayed with.
7. Click on the drop down in the Use field.
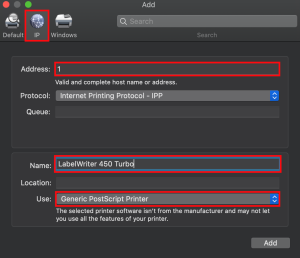
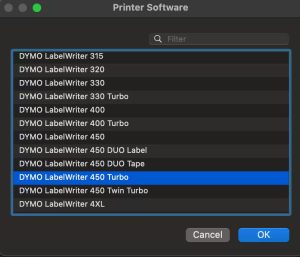
8. Choose ‘Select software’.
9. From the list of printers, find the device you would like to add and select it.


10. If you have filled out the fields mentioned above, select ‘Add’.
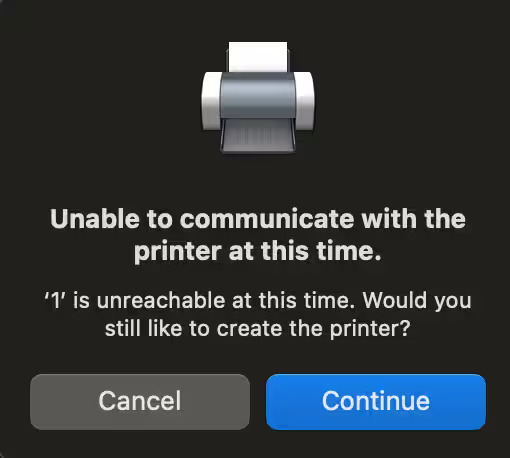
11. You may receive an error informing you the printer could not be found. This is normal as the Address you have entered does not really exist. Select ‘Continue’, and your dummy printer will finish installing.

Adding a dummy printer on macOS Ventura and later.
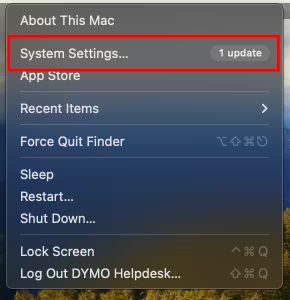
1. Navigate to the Apple icon and select ‘System Preferences’.
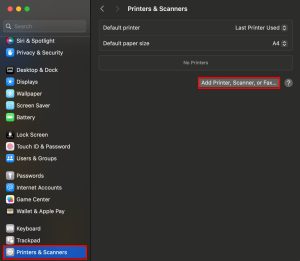
2. From the menu, select ‘Printers & Scanners’.
3. Within Printers & Scanners click on the ‘Add Printer, Scanner, or Fax…’ option.
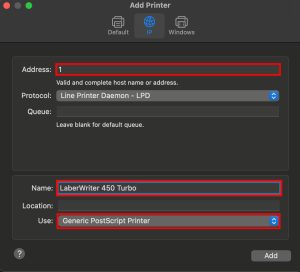
4. Select the IP tab at the top of the window.
5. In the Address field, type a number. It does not matter what number you type.
6. In the Name field, type in the name of your printer. This will be the name the dummy printer is displayed with.
7. Click on the drop down in the Use field.
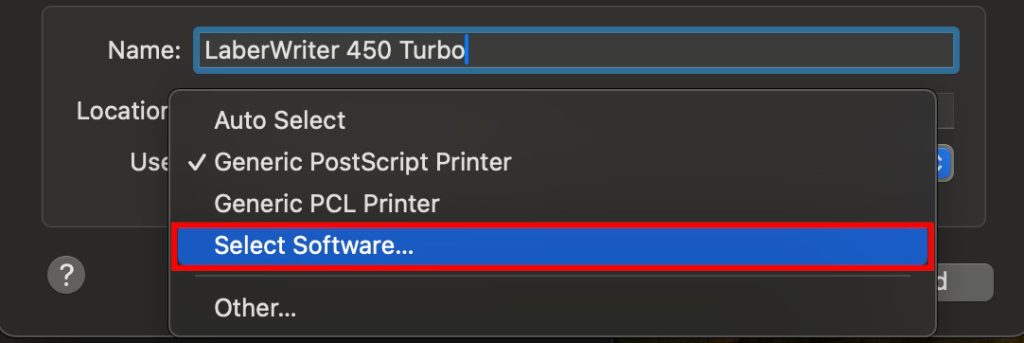
8. Choose ‘Select software’.
9. From the list of printers, find the device you would like to add and select it.
10. If you have filled out the fields mentioned above, select ‘Add’.
11. You may receive an error informing you the printer could not be found. This is normal as the Address you have entered does not really exist. Select ‘Continue’, and your dummy printer will finish installing.
![]()