How to use DYMO Label Software v.8?
This article will provide you a reduced overview of the different features in DYMO Label and how to use them. You can access the online manual for your software from within DYMO Label v.8. Go to the top ribbon >> Help >> Contents.
Or from our website DYMO.com . Direct links to the extensive manual for the software can be found here and here .
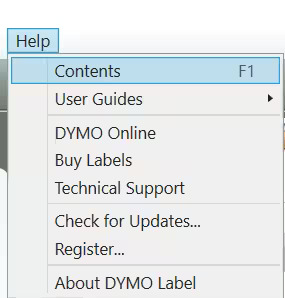
Table of contents
- Finding the software version
- Setting up a project in DYMO Label
- Adding elements (Text, Address, Images, Barcodes)
- DYMO Label Address Book
- Importing Data
- Trivia
Finding the software version
On Mac:
- Open the DYMO software.
- Navigate in the top left corner next to the Apple logo.
- Click the software name and select “About…”
- The version is displayed in a pop-up screen.
- Click on this small window to go back to the workspace below.
On Windows:
- Open the DYMO software.
- Navigate in the top ribbon to ‘Help’.
- Select “About…”.
- The version is displayed in a pop-up screen.
- Click on this small window to go back to the workspace below.
Setting up a project in DYMO Label
Printer and label selection
- Select an installed printer at the bottom of the screen, on the right of the side bar.
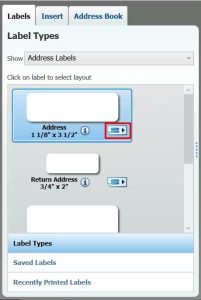
- Select the label in the left side bar by going to the Labels tab > Label Types.
- Select the label category from the dropdown list next to ‘Show’. Find the label size you are using on the list below.
-
- Windows
Click on the label on the list and select the layout you want. You can also select a blank label and create your layout in the Insert tab. - MacOS
Click on the small rectangular button next to the name of the label to select a layout. You can also double-click on the label on the list to start with a blank label and create your own layout in the Insert tab.
- Windows
Adding elements (Text, Address, Images, Barcodes)
Editing text
If the label on the screen is blank, please click on the ‘Insert’ tab in the side bar and add a text object that you would like to use, i.e. Text or Address. Extend the blue outline to the desired size. Then click on the sample text/address inside the blue outline, remove the text/address and start typing.
Make sure the ‘Insert’ tab is selected in order resize or move the object on the label. Please use the panel on the top side to change properties such as font and its size, underline, alignment, etc.
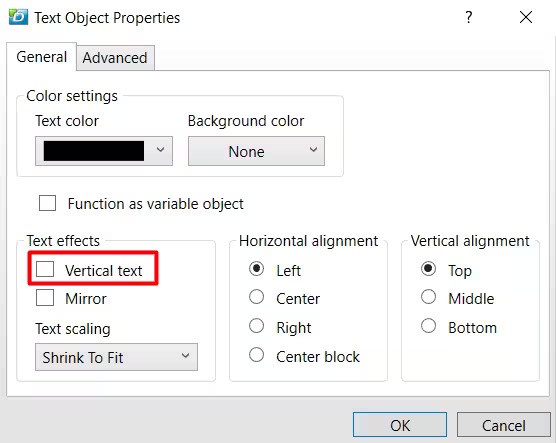
Vertical text
Add text to your label if one is not on there already. Click on the ‘Insert’ tab and drag a Text object to the label. Select the text box and click Properties then choose Vertical text. Click OK and enter text on the label.
Supported barcodes and graphics
| Barcodes | Graphic formats |
|---|---|
|
|
Inserting a graphic
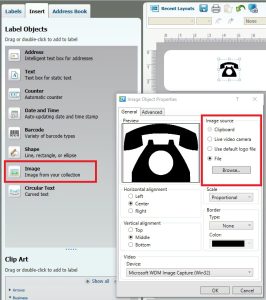
DYMO Label Software comes with many pre-defined, customizable label templates. You can either open a label template that contains a graphic object or use the ‘Insert’ tab to place a graphic object on a label.
To change the image that appears within the graphic object:
- Double-click on the graphic object/image that appears on the label template. A dialog box will appear.
- Select the graphic/image you’d like to appear on the label and click OK.
For best results when you import a graphic, make sure the graphic you are importing is close to the size of the graphic that will appear on the label. For example, if you want to print your company logo on a shipping label, do not import this logo using a graphic that is 5 x 7 inches. Use black and white graphics whenever possible.
Inserting a barcode
You can create labels that include barcodes based on many formats or types. You can choose from Code 39 (also called “Code 3 of 9”), Code 128, Interleaved 2 of 5, UPC, EAN, UCC/EAN 128, ITF-14, Codabar, QR and PDF417 barcode types.
Please note: This documentation assumes that you already understand the differences between barcode types and have a plan in place to incorporate barcodes into your organization. If you need to learn more about barcodes, many excellent how-to books are available online.
- Select the Insert tab.
- Double-click Barcode.
- A new Barcode object is added to your label. By default, the object contains a Code 39 barcode with fixed data.
- Right-click the object, and then choose Properties.
- Make any desired changes in the Barcode Object Properties dialog box, and then click OK.
- Move and resize the object as necessary.

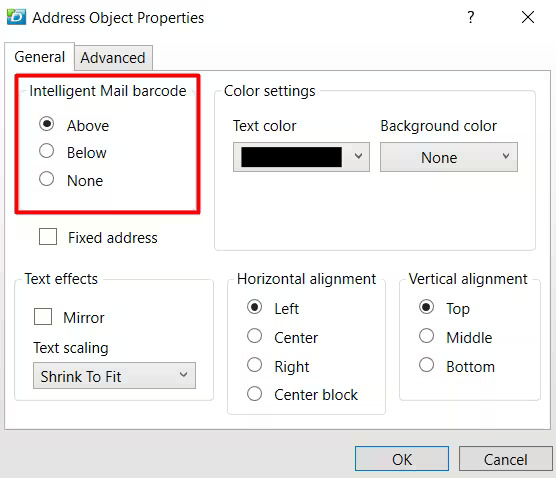
Intelligent mail barcode (US only)
The Intelligent Mail barcode is USPS barcode technology used to sort and track letters and flats. Intelligent Mail barcode technology combines the capabilities of the POSTNET barcode and the PLANET Code barcode into one unique barcode.
DYMO Label Software version 8 automatically utilizes Intelligent Mail barcodes in address templates on labels with the minimum length 3 1/2″ (e.g. 30251, 30252). However, if you prefer to print your address labels without it, you can also remove it by choosing ‘None’ under Intelligent Mail barcode in ‘Address Object Properties’.
DYMO Label Address Book
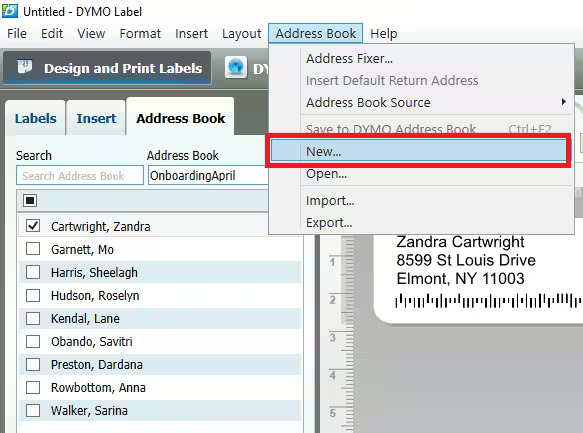
Creating an Address Book
You can create multiple Address Books to hold addresses or other data. If you want to import addresses or data into the Address Book, you must first create the Address Book into which you want to import the information. The default Address Book installed with DYMO Label software is named Sample Address Book.
- Choose New from the Address Book menu. The New Address Book dialog box appears.
- Enter a name for the new Address Book in the Name box.
- Accept the default location to save the Address Book to, or click Browse to choose a different location.
- Choose one of the following from the Contents list:
- Address List – to create a new Address Book that contains address data.
- Data List – to create a new Address Book that contains non-address data.
- Click OK. A prompt appears, asking if you want to import data from an existing file.
- Do one of the following:
- Click No to create a blank Address Book.
- Click Yes and then follow the instructions in the Address Book Import Wizard to import data from an existing file.
- The new Address Book is saved and is displayed on the Address Book tab.
Browse for an existing Address Book
If you already created an Address Book in the past, you can switch to it or browse for it in DYMO Label software. By default Address Books are stored in your Documents > DYMO Label > Address Books.
- Choose the Address Book tab in the left panel.
- Click on the arrow under Address Book, on the right side of Search, to open from the Address Book list.
- If listed, select your Address Book to switch to it.
- If the Address Book you want to open is not listed, choose Browse.
- Navigate to the location of your Address Book. By default: Documents > DYMO Label > Address Books.
- Select the Address Book that you want to open, and then click Open.
- The selected Address Book is displayed on the Address Book tab.
Adding Contacts
You can add addresses to the Address Book individually by typing the information or pasting the data from another source. You can also import a list of address information from a text, delimited, or Microsoft Excel file.
The Address Book automatically determines first and last name based on the first line of text. You can choose how the entry is filed with the File As setting. In addition, you can set up address keywords to make sure certain text is filed appropriately, such as a company name.
Please note: the DYMO Label Software address book can save up to 999 contacts. Beyond 999 contacts, you will need to create a separate address book.
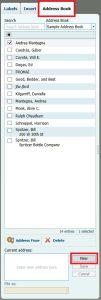
- Select the Address Book tab.
- Click New next to the Current address box.
- Enter or paste the information for the new address into the Current address box.
- Choose how you want to file the address from the File as list, or enter the name as you want the entry to be filed.
- Click Save.
- The new address appears on the label in the Edit area and the first line of the new address appears in the address list. The addresses are automatically sorted in alphabetical order based on the File as selection.
- Open a blank label or select a label template from the ‘Address’ category.
- If you are using a blank label, please click on the ‘Insert’ tab and select ‘Address’. This will place a new text box on your label which is designed to work with your contacts.
- Once you select the text box on your label, open the ‘Address Book’ tab containing the records you need to print
- Please use the drop-down menu to select your contact list.
- Now you should see the list of contacts you have added in the previous steps.
- Please click on the boxes next to the contacts you would like to print. If you would like to print all of them, please use the ‘Select all’ checkbox.
Importing Contacts
- Create a new Address Book or open the Address Book you want to import data into.
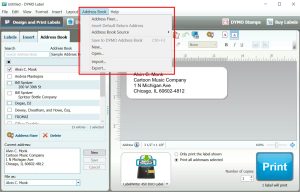
- Choose Import from the Address Book menu. The Address Book Import Wizard starts.
- Follow the instructions in the Address Book Import Wizard.
- When finished, click Import. The data is imported into the currently opened Address Book and displayed in the address list.
Exporting Contacts
- Click on the ‘Address Book’ tab and select your address book from the drop-down list.
- Click ‘Address Book’ at the top of the screen and select Export.
- Choose where you want the file to be exported to and the name of the file once it is exported.
- Click Save.
Note: When you export data from your DYMO Label, each entry is exported as a single record and each line of data as a single field. The data is exported as a .CSV file.
Importing data
Using DYMO Label software, you can quickly print labels from a number of standard database formats including Microsoft Access (Windows), Microsoft Excel, text files, and Universal Data Links (UDL) (Windows).
Database information can be inserted into a variable Text, Address, or Barcode object. If you have more than one Address, Text, or Barcode object on your label, you can select the fields to insert in each of the available objects.
To import and print data
- Select the label type and layout you want to use. Make sure that your label layout includes at least one variable Text, Address, or Barcode object.
- From the File menu, choose Import Data and Print, then do one of the following:
- Choose New to import and print a new set of data.
- Choose a saved data and layout set to print.
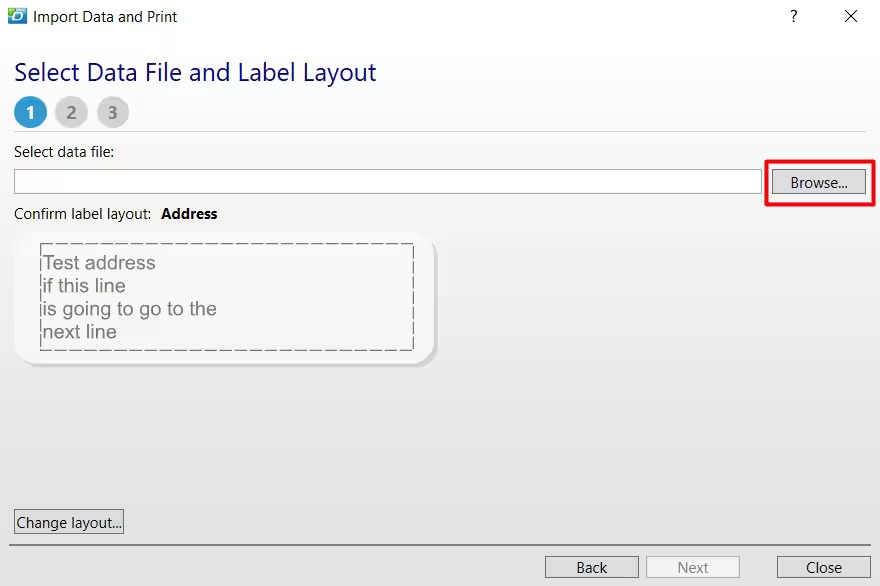
- The Import Data and Print wizard starts.
- Select the database file you would like to import, using the browse function.
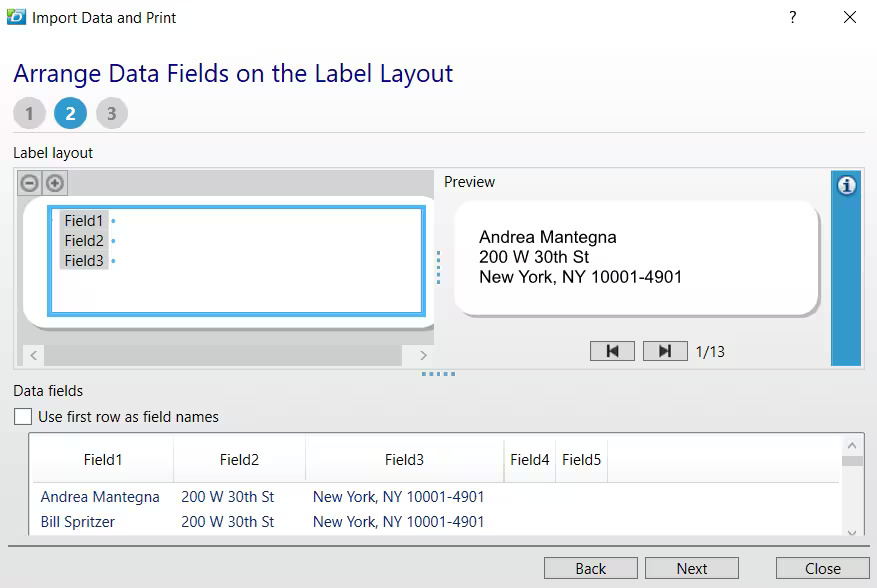
5. Assign the fields in the order of your choice by double-clicking on the fields or dragging them onto the blue borders around your label (blue dot counts as a space). See the preview for the results.
6. Once you are done assigning your fields, press next and check the labels you would like to print.
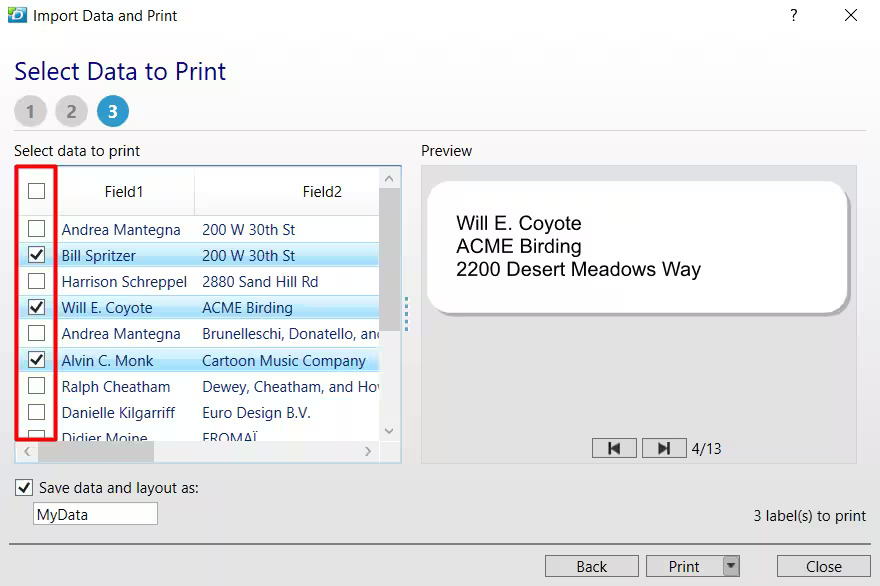
Once you have the labels selected, click on print. Please note, if you would like to make adjustments to the label layout, font type or size, you have to import the data again with those changes made to your label.
Trivia
- Where does DYMO Label Software v8 save label templates and address books?
- Your saved label templates and address books are stored within the DYMO Label folder in your Documents folder.
- Please note, this is a default location and can be changed within the preferences of the software.
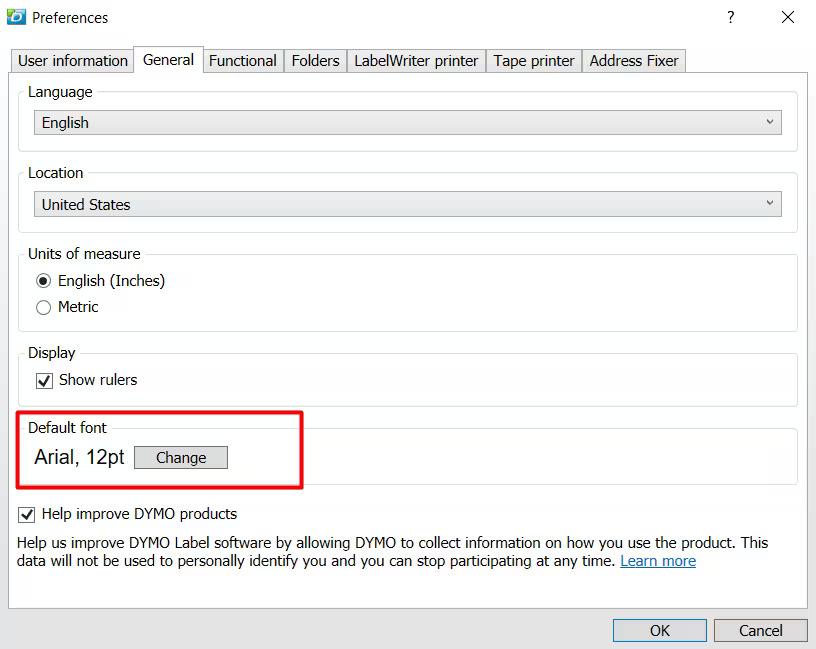
- How do I change the default font settings in the DYMO Label Software?
- In DYMO Label Software, select ‘Preferences’ from the Edit menu. Go to the General Tab and change the default font settings.
- What type of fonts does DYMO Label v8 support (Windows)?
- DYMO Label v.8 for Windows utilizes Microsoft Windows Presentation Foundation (WPF) and supports all True Type fonts that are supported by WPF.
- What version of QuickBooks is the DYMO Label Software v8 compatible with?
- DYMO Label Software v8 is compatible with QuickBooks 2007 – QuickBooks 2018, Professional and Premier editions only.
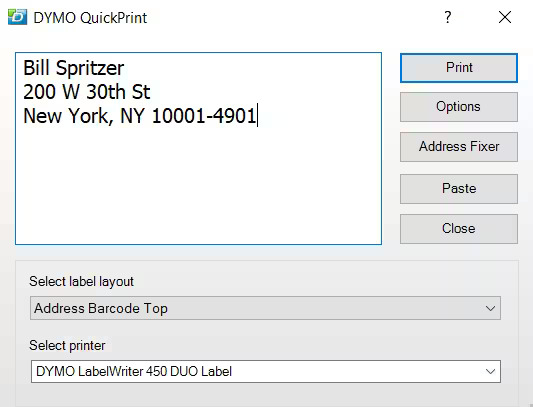
- What is the DYMO Label Quick Print widget?
- DYMO Label Software v8 includes a Quick Print widget which allows you to quickly print a label directly from your desktop without opening DYMO Label software.
- To use on MacOS
-
-
- Press F12 to display the installed widgets.
- In the DYMO QuickPrint widget, enter or paste the text you want to print on your label.
- Optionally, click in the bottom-right corner of the widget to change the label layout, change the position of the Intelligent Mail barcode before printing, or choose a different label printer.
-
-
- To use on Windows
-
-
- Double-click the QuickPrint icon in the system tray.
- Drag, paste, or type the text you want to print on a label.
- Click Print.
- From the Quick Print widget, you can also change the label layout or choose a different label printer.
-
- Can Address Fixer convert addresses to upper case, lower case, or mixed case characters?
- YES, when using our DYMO Label software on macOS (only).
-
-
- Click DYMO Label in the top left corner and select Preferences.
- Click on the Address Fixer tab.
- Make the appropriate selection in the Address capitalization section
- Click OK to apply.
-
- What is the LWRemove/LWSupport utility?
- The LWSupport utility is provided by DYMO to uninstall DYMO printer drivers in Windows. Using LWSupport can help resolve many common label printing issues.
- Does DYMO Label meet the requirements for 508 compliance?
- No, the software does not meet the requirements for 508 compliance.
- Can I print foreign language characters with DYMO Label software?
- Yes, DYMO Label Software v.8 supports Unicode which allows you to print foreign language characters.
![]()