Why am I receiving an error while printing on Mac ?
- Error – Printing message.
- LabelWriter is not printing.
- ‘Error – Out of Paper’ message.
- Other driver-related issues.
Reinstalling the DYMO LabelWriter printer is often the most effective solution.
Please click on the version of your operating system for the appropriate steps.


Printing Error on MacOS 13:
1. Remove both the power and the USB cable from the back of your LabelWriter.
2. Remove the labels from the feed path (use the black release lever located on the left-hand side).
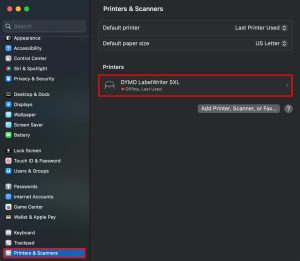
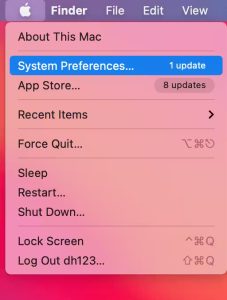
3. Click on the Apple logo in the top left corner and select ‘System Settings’.

4. Scroll down on the left-hand side and select ‘Printers & Scanners’. Once the tab opens, please select your DYMO printer.
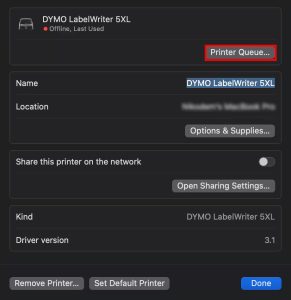
5. Select ‘Print Queue…’ in the top right of the new window.
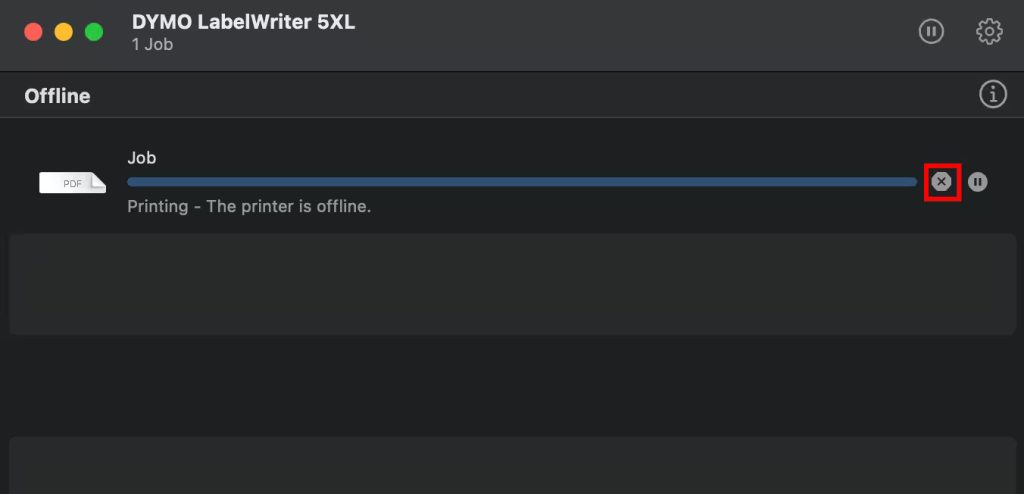
6. If there is anything in the queue, please cancel the documents by clicking on the ‘x’ next to each print job. Do this until the queue is completely clear.
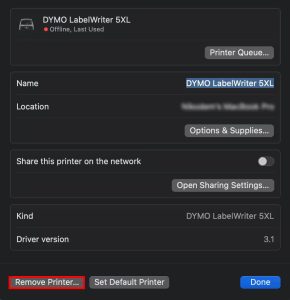
7. Remove the printer from Printers and Scanners using the ‘Remove printer…’ button.
8. Re-attach the power cable to the LabelWriter.
9. Re-insert the labels into the feed path. Please see our video guide for the LabelWriter 5 series.
10. Re-attach the USB cable into the printer. Make sure that the cable is connected to your Mac securely. It is best if the printer is connected directly. If you are using an USB adapter, hub or dock, the printer might not get recognized correctly.
11. Open the DYMO software, create a label, and print.
Printing Error on MacOS 12.6 and older:
2. Remove the labels from the feed path (Use the label release lever which is located on the left side).
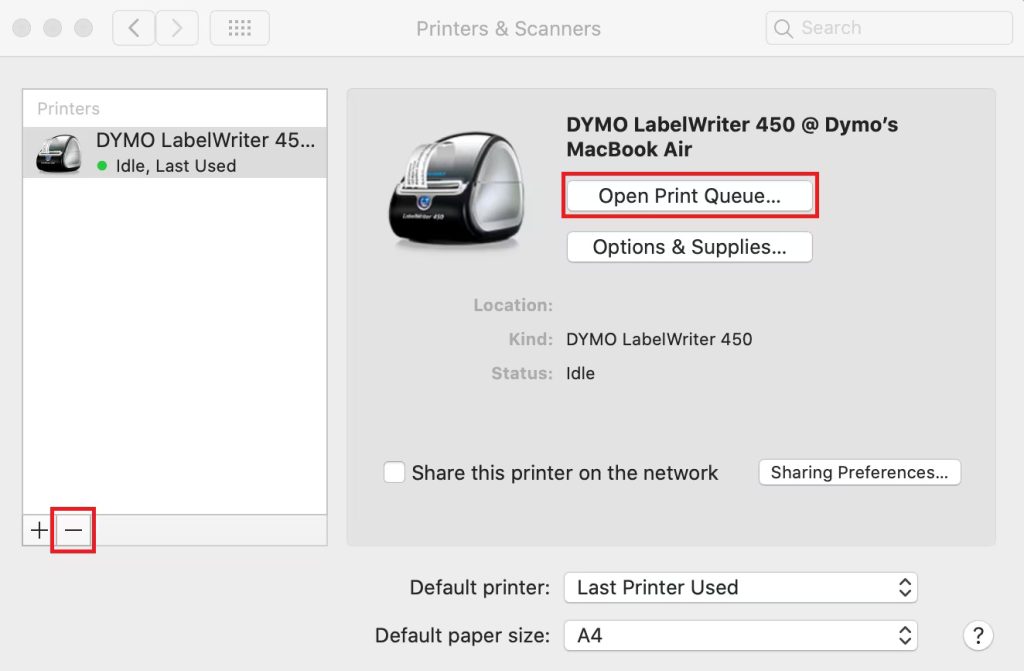
4. Select ‘Printers and Scanners’ and select your DYMO printer. Click on the option that says ‘Open print queue…’. If there are any documents in the queue, remove them by clicking the ‘x’ next to each document, until the queue is cleared.
5. Remove the printer by clicking on the ‘-‘ (minus) sign in the bottom left of the printers and scanners menu, then select ‘Remove printer’.
6. Re-attach the power cable to the LabelWriter.
7. Re-insert the labels into the feed path. Please see our video guide for the LabelWriter 5 series.
8. Re-attach the USB cable into the printer. Make sure that the cable is connected to your Mac securely. It is best if the printer is connected directly. If you are using an USB adapter, hub or dock, the printer might not get recognized correctly.
9. Open the DYMO software, create a label, and print.
![]()