How to reinstall the Web Service Certificate on Windows ?
When installing the DYMO Software, it will also install the DYMO Web Service and the certificate it requires to run. This Web service allows web pages to directly contact the LabelWriter to perform a print job. If the Web Service did not start up properly or the certificate got corrupt, the printer may not be reachable through web pages.
Possible error messages are:
- None of these ports were configured to use SSL certificate
- The SSL connection could not be established, see inner exception. Authentication failed because the remote party has closed the transport stream
- Could not create SSL/TLS secure channel
In that case a complete reinstall of the software and the certificate will be needed. Please perform the following steps as an administrator or from the administrator account!
- First, remove the printer by following article: Why am I receiving an error while printing on Windows? Do not yet reconnect the printer to the computer.
- Secondly, clean uninstall the software by following article: How to completely uninstall the DYMO Software?
Please note: do NOT reinstall the software before removing the web certificate as explained below.
To remove the Web Service Certificate
- Reminder, please make sure you are logged in as an administrator.
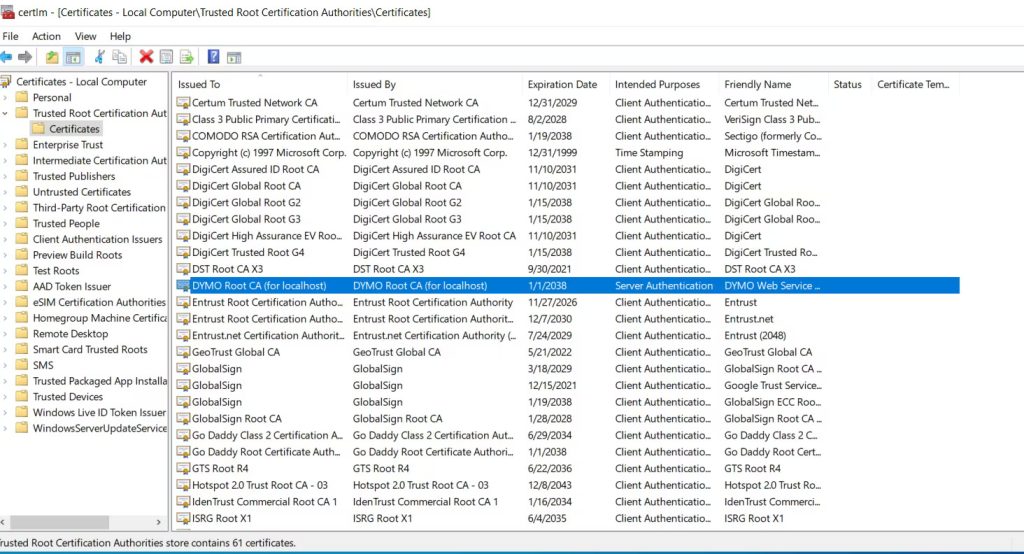
- Press the Windows Key + R and type in certlm.msc.
- In the Certificate Manager, please go to Certificates – Local Computer\Trusted Root Certification Authorities\Certificates. Find DYMO Root CA (for localhost) and delete it.
- Now empty the recycle bin and restart the computer.
Reinstall the DYMO software.
- Perform the installation of the DYMO software using the installer. You can find the software HERE.
- Restart your computer.
Set up the printer again.
- Reconnect the power cable to the back of your printer and turn on your device.
- Insert your DYMO Authentic labels into the printer. Ensure that the labels are facing down and aligned completely to the left-hand side. For a visual reference, please refer to our video tutorial below:
LabelWriter 450 series and older
LabelWriter 450 series and older
Print a label
- Reconnect the USB cable or LAN to the back of your printer. Please make sure the other end is connected directly to your computer.
- The DYMO icon will populate in the task bar (bottom right corner of your screen).
- When you right click the icon, a menu will pop up. Please click “Diagnose” from the popup menu.
- If you receive a window with ‘DYMO Connect Service is running’ or ‘DYMO Label Web Service is running’, the certificate has been installed correctly and you are ready to print.
![]()