Why am I receiving an error while printing on Windows?
This guide is a solution for the following issues:
- Error – Printing message.
- LabelWriter not printing.
- ‘Error – Out of Paper’ message.
- Printer offline.
- Other driver-related issues.
Reinstalling the DYMO LabelWriter printer is often the most effective solution.
Please click on the version of your operating system for the appropriate steps.


Error printing on Windows 10
1. Remove both the Power and the USB cable from the back of your LabelWriter.
2. Remove any labels inserted into your printer (use the black release lever located on the left-hand side).
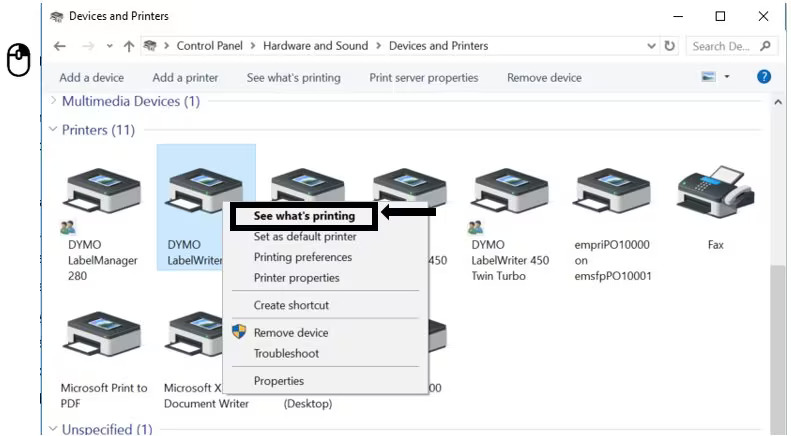
3. Navigate to Control Panel \ Hardware and Sound \ Devices and Printers.
4. Right-click on LabelWriter and select See what’s printing.
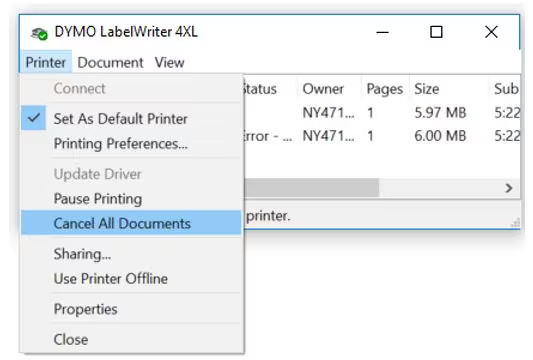
5. If there is anything in the queue cancel it by selecting ‘Cancel All Documents‘ in ‘Printer‘ tab or right-click on each document and select ‘Cancel’.
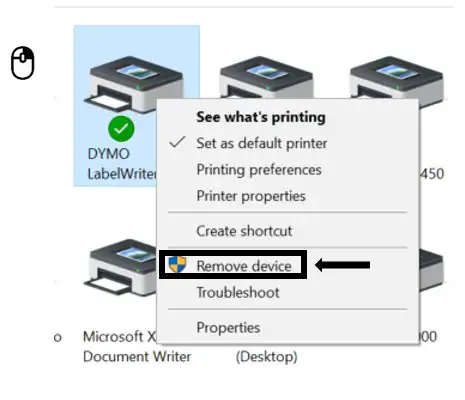
6. Remove LabelWriter from Devices and Printers: Right-click on the LabelWriter listed under the printer heading and select Remove Device (Administrator rights are required).
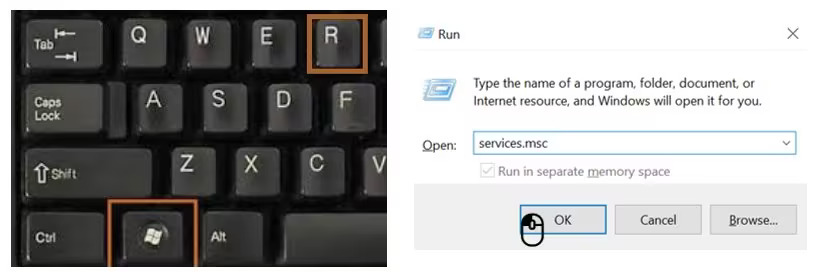
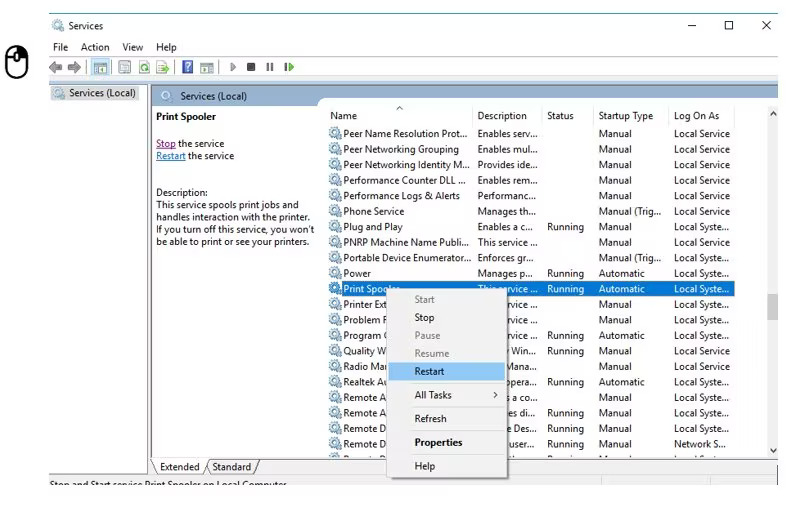
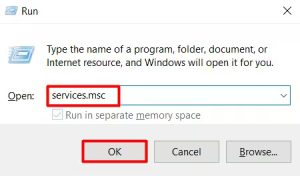
7. Press the Windows Key + R and type in services.msc and press Enter or type ‘Services’ in Windows search.
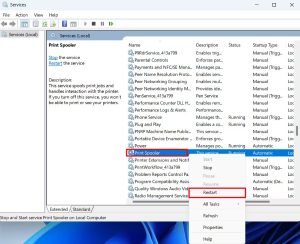
8. In the Services window locate Print Spooler. Right-click on Print Spooler and select Restart.
9. Navigate back to Control Panel\Hardware and Sound\Devices and Printers. Select (left-click) any printer from the list of available printers and select Print server properties (at the op of the page).
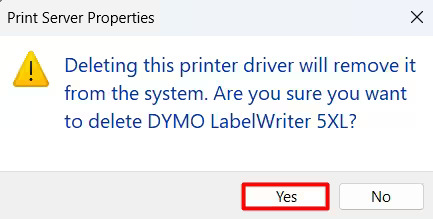
10. Select the ‘Drivers‘ tab and choose the LabelWriter from the list and remove it by selecting the Remove button at the bottom of the window.
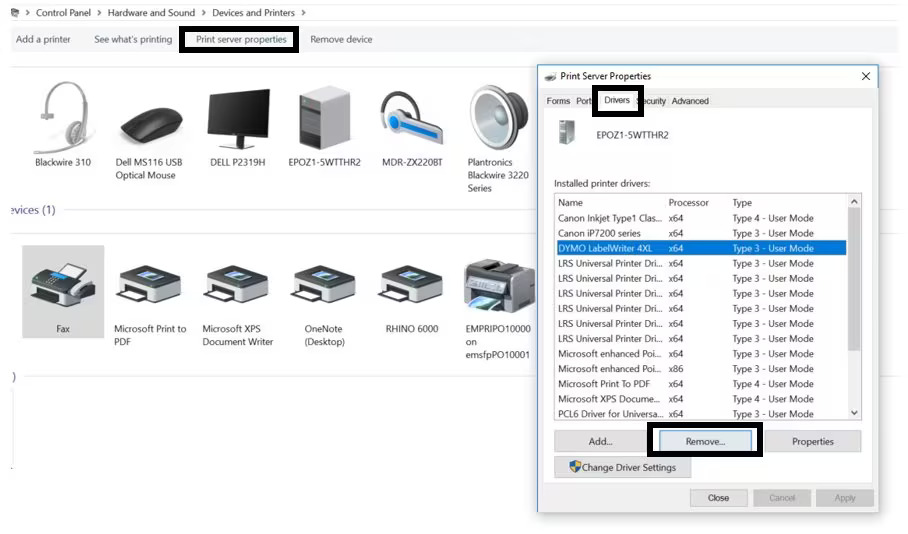
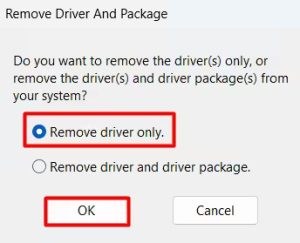
11. Select ‘Remove driver only.’ from the pop-up window and select ‘OK’. Confirm deleting the drivers by selecting ‘Yes”.

12. Reconnect the Power cable to your LabelWriter and make sure it is turned on.
13. Re-insert the labels into the feed path. Ensure that the labels are facing down and aligned completely to the left-hand side. For a visual reference, please refer to our video tutorial below:
LabelWriter 450 series and older
LabelWriter 550 series
14. Reconnect the USB cable (ensure that it is connected to the computer). If you use the LAN-setup, first try with the USB cable.
15. LabelWriter should show up in Control Panel\Hardware and Sound\Devices and Printers as a printer and should be ready to use.
Error printing on Windows 11
1. Remove both the Power and the USB cable from the back of your LabelWriter.
2. Remove any labels inserted into your printer (use the black release lever located on the left-hand side).
3. Navigate to Settings > Bluetooth & devices > Printers & scanners.
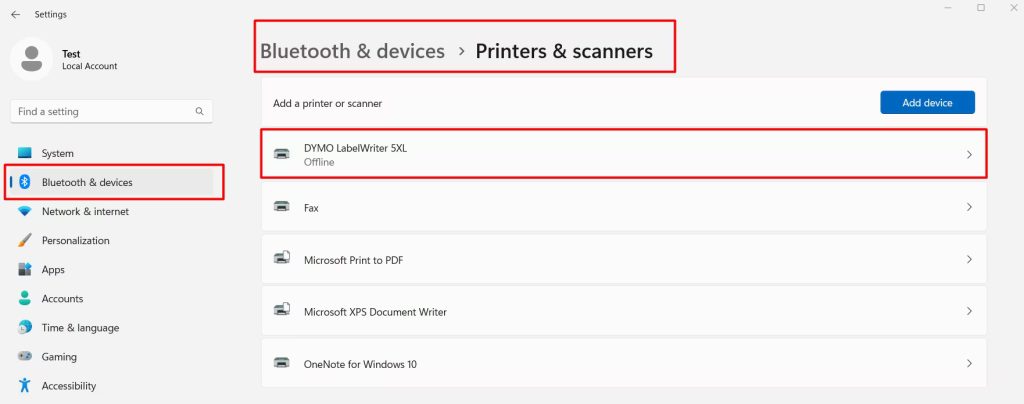
4. Select your LabelWriter printer and choose ‘Open print queue‘.
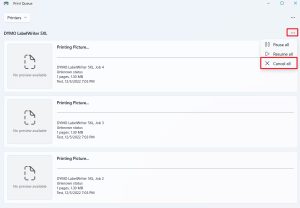
5. If there is anything in the queue, cancel it by selecting the three dots and choosing ‘Cancel all‘.
6. Remove LabelWriter from Printers & scanners by selecting the printer and choosing ‘Remove‘. Administrator rights are required.

7. Press the Windows Key + R and type in services.msc and press Enter or type ‘Services’ in Windows search.

8. In the Services window locate Print Spooler. Right-click on Print Spooler and select Restart.
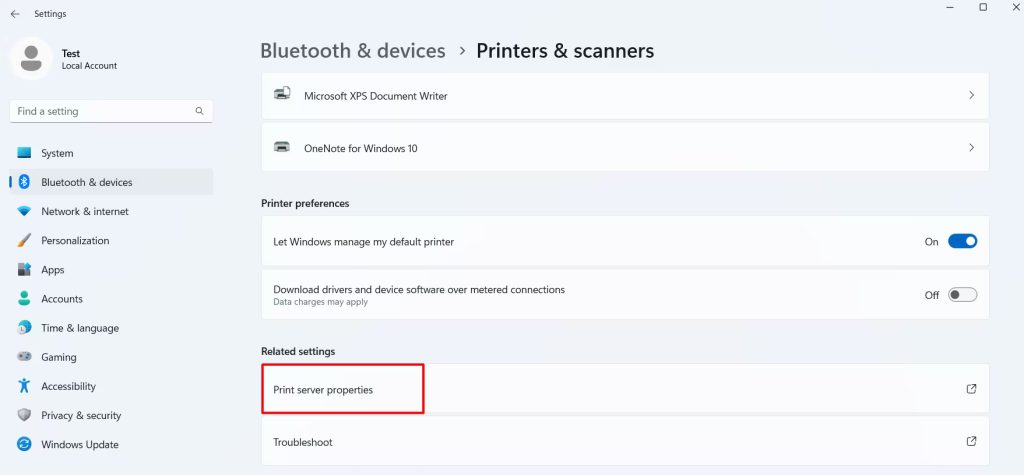
9. Go to Settings > Bluetooth & devices > Printers & scanners and select ‘Print server properties‘ under the ‘Related settings‘ section.
10. Go to the ‘Drivers‘ tab and select your LabelWriter. Remove it by using the ‘Remove‘ button at the bottom of the window.
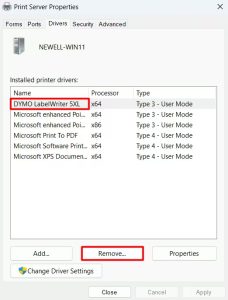
11. Select ‘Remove driver only.’ in the pop-up window and select ‘OK’. Confirm deleting the drivers by selecting ‘Yes’.
12. Reconnect the Power cable to your LabelWriter and make sure it is turned on.
13. Re-insert the labels into the feed path. Ensure that the labels are facing down and aligned completely to the left-hand side. For a visual reference, please refer to our video tutorial below:
LabelWriter 450 series and older
LabelWriter 550 series
14. Reconnect the USB cable (ensure that it is connected to the computer). If you use the LAN-setup, first try with the USB cable.
15. Your LabelWriter should show up in Settings > Bluetooth & devices > Printers & scanners and should be ready to use.
![]()