How to add a printer in DYMO Connect Mobile?
The application DYMO Connect Mobile available for Android and iOS (available HERE) works with the DYMO MobileLabeler and the
LabelWriter Wireless label printers. You can connect up to two label makers at one time.
If you have not yet paired and/or connected to a label printer, the virtual label printers, DYMO ML or
LabelWriter, let you design and save labels. You will need to connect to and select an actual label
printer before you can print any labels designed using a virtual printer. Please refer to the User Guide of your device to find out how to properly
set up your label printer before adding it to DYMO Connect Mobile.
Configuring the LabelWriter Wireless
The LabelWriter Wireless has two wireless methods, one being the Access Point, the other one is when the device has been
configured on your WiFi netowork. Please follow our article How do I set up my LabelWriter
Wireless? if you would like to configure the printer on your wireless network.
Pairing the MobileLabeler to your Mobile Device
Pair the label maker to your mobile device using Bluetooth settings on your device. The label maker displays in your
list of Bluetooth devices with the name DYMO ML xxxx where xxxx is unique for every label maker.
Please note, if you are asked for a pairing code, use 0000.
Pairing with an iOS device
- In Settings, turn on the Bluetooth setting.
- Tap DYMO ML xxxx under MY DEVICES to connect the label maker.
After a few seconds, Connected is displayed when paring is complete.
Pairing with an Android device
- In Settings, turn on the Bluetooth setting.
- Tap DYMO ML xxxx under Available devices to pair the label maker.
After a few seconds, is listed under Paired devices when paring is complete.
Adding a Network Printer to DYMO Connect Mobile
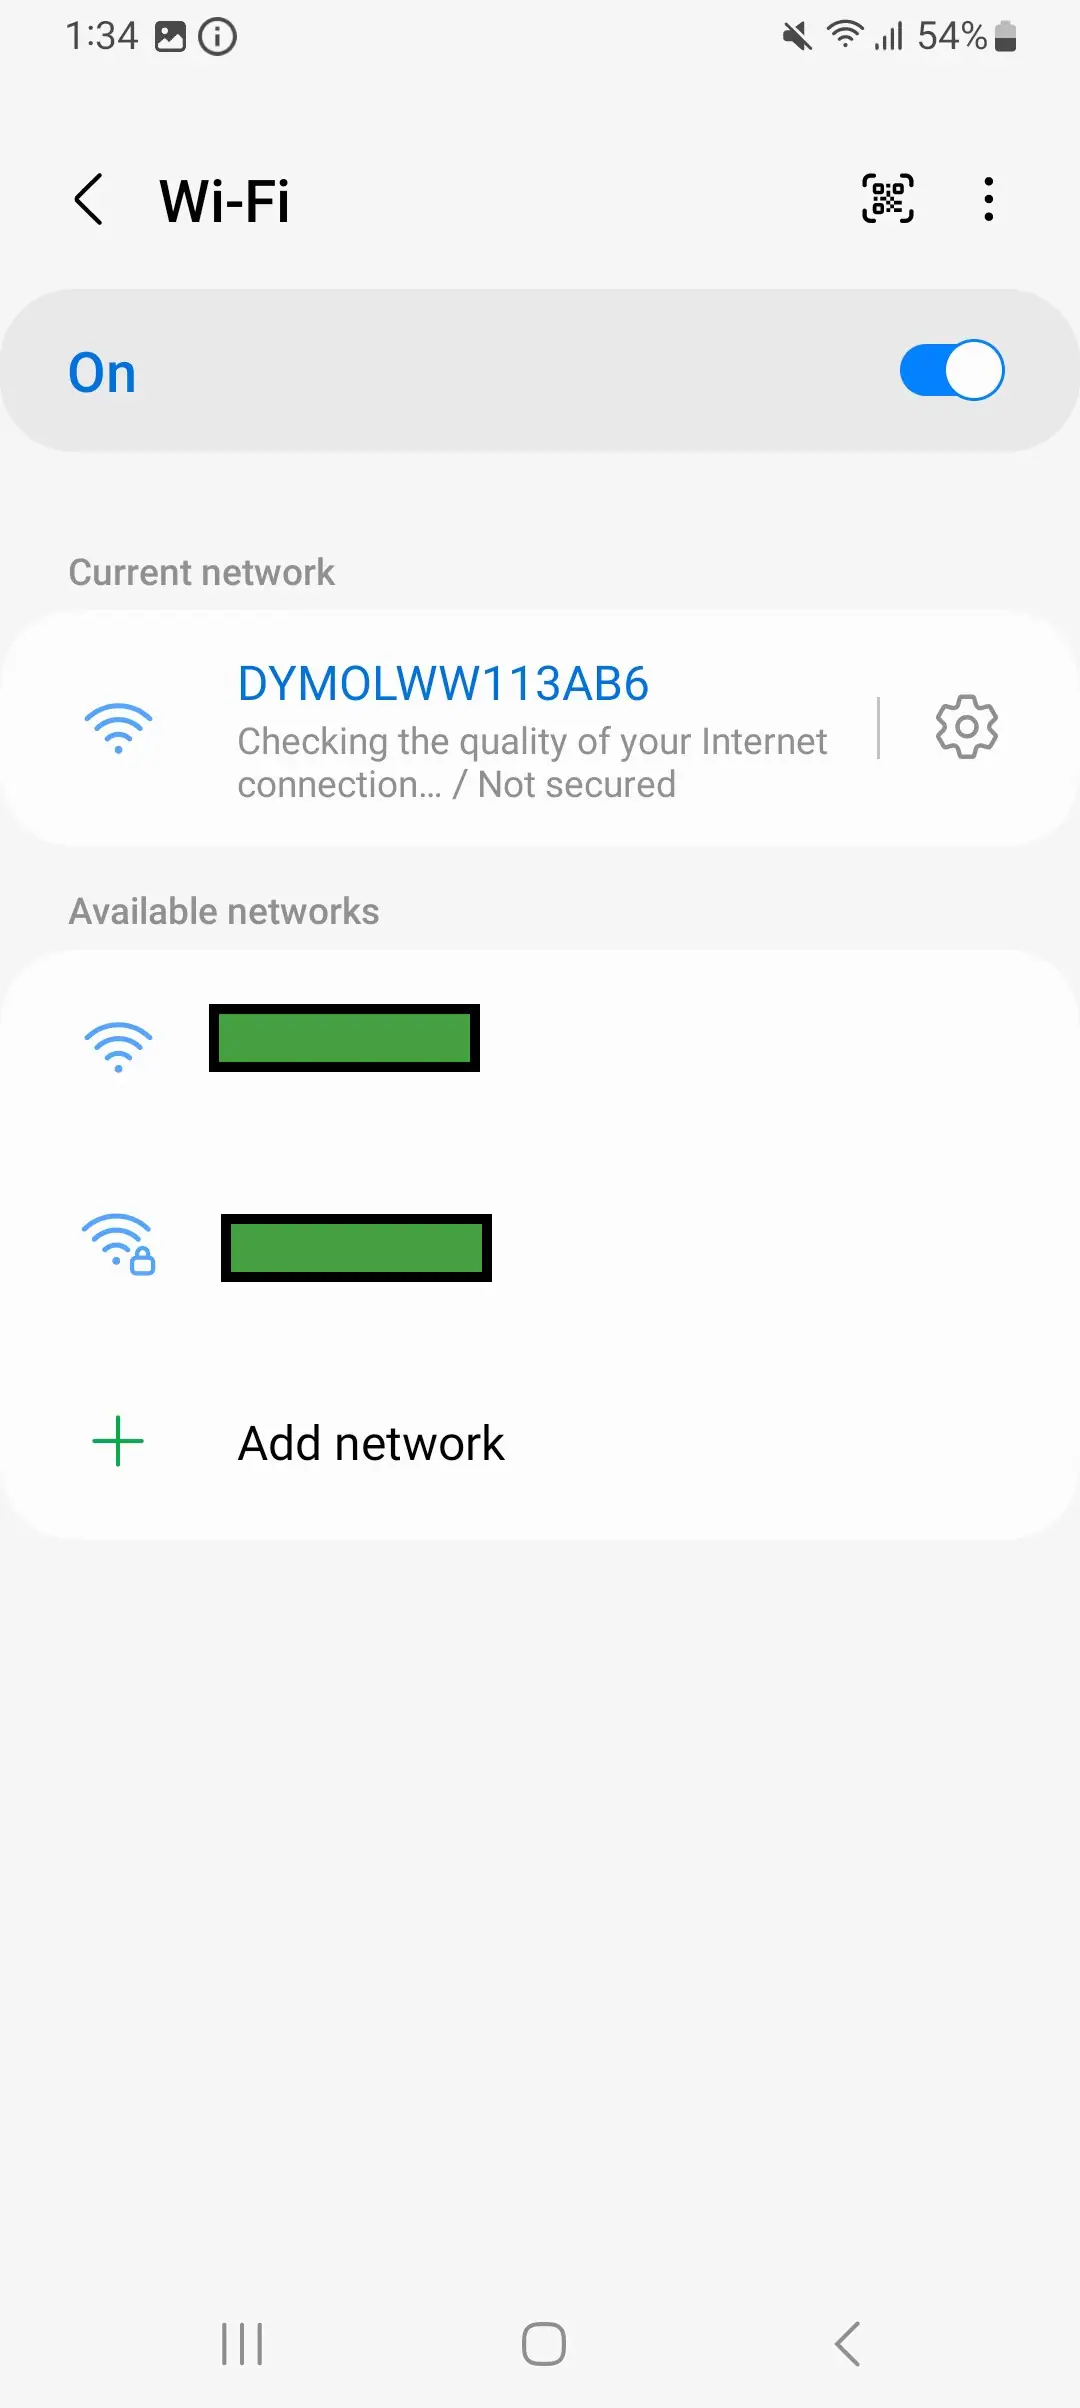
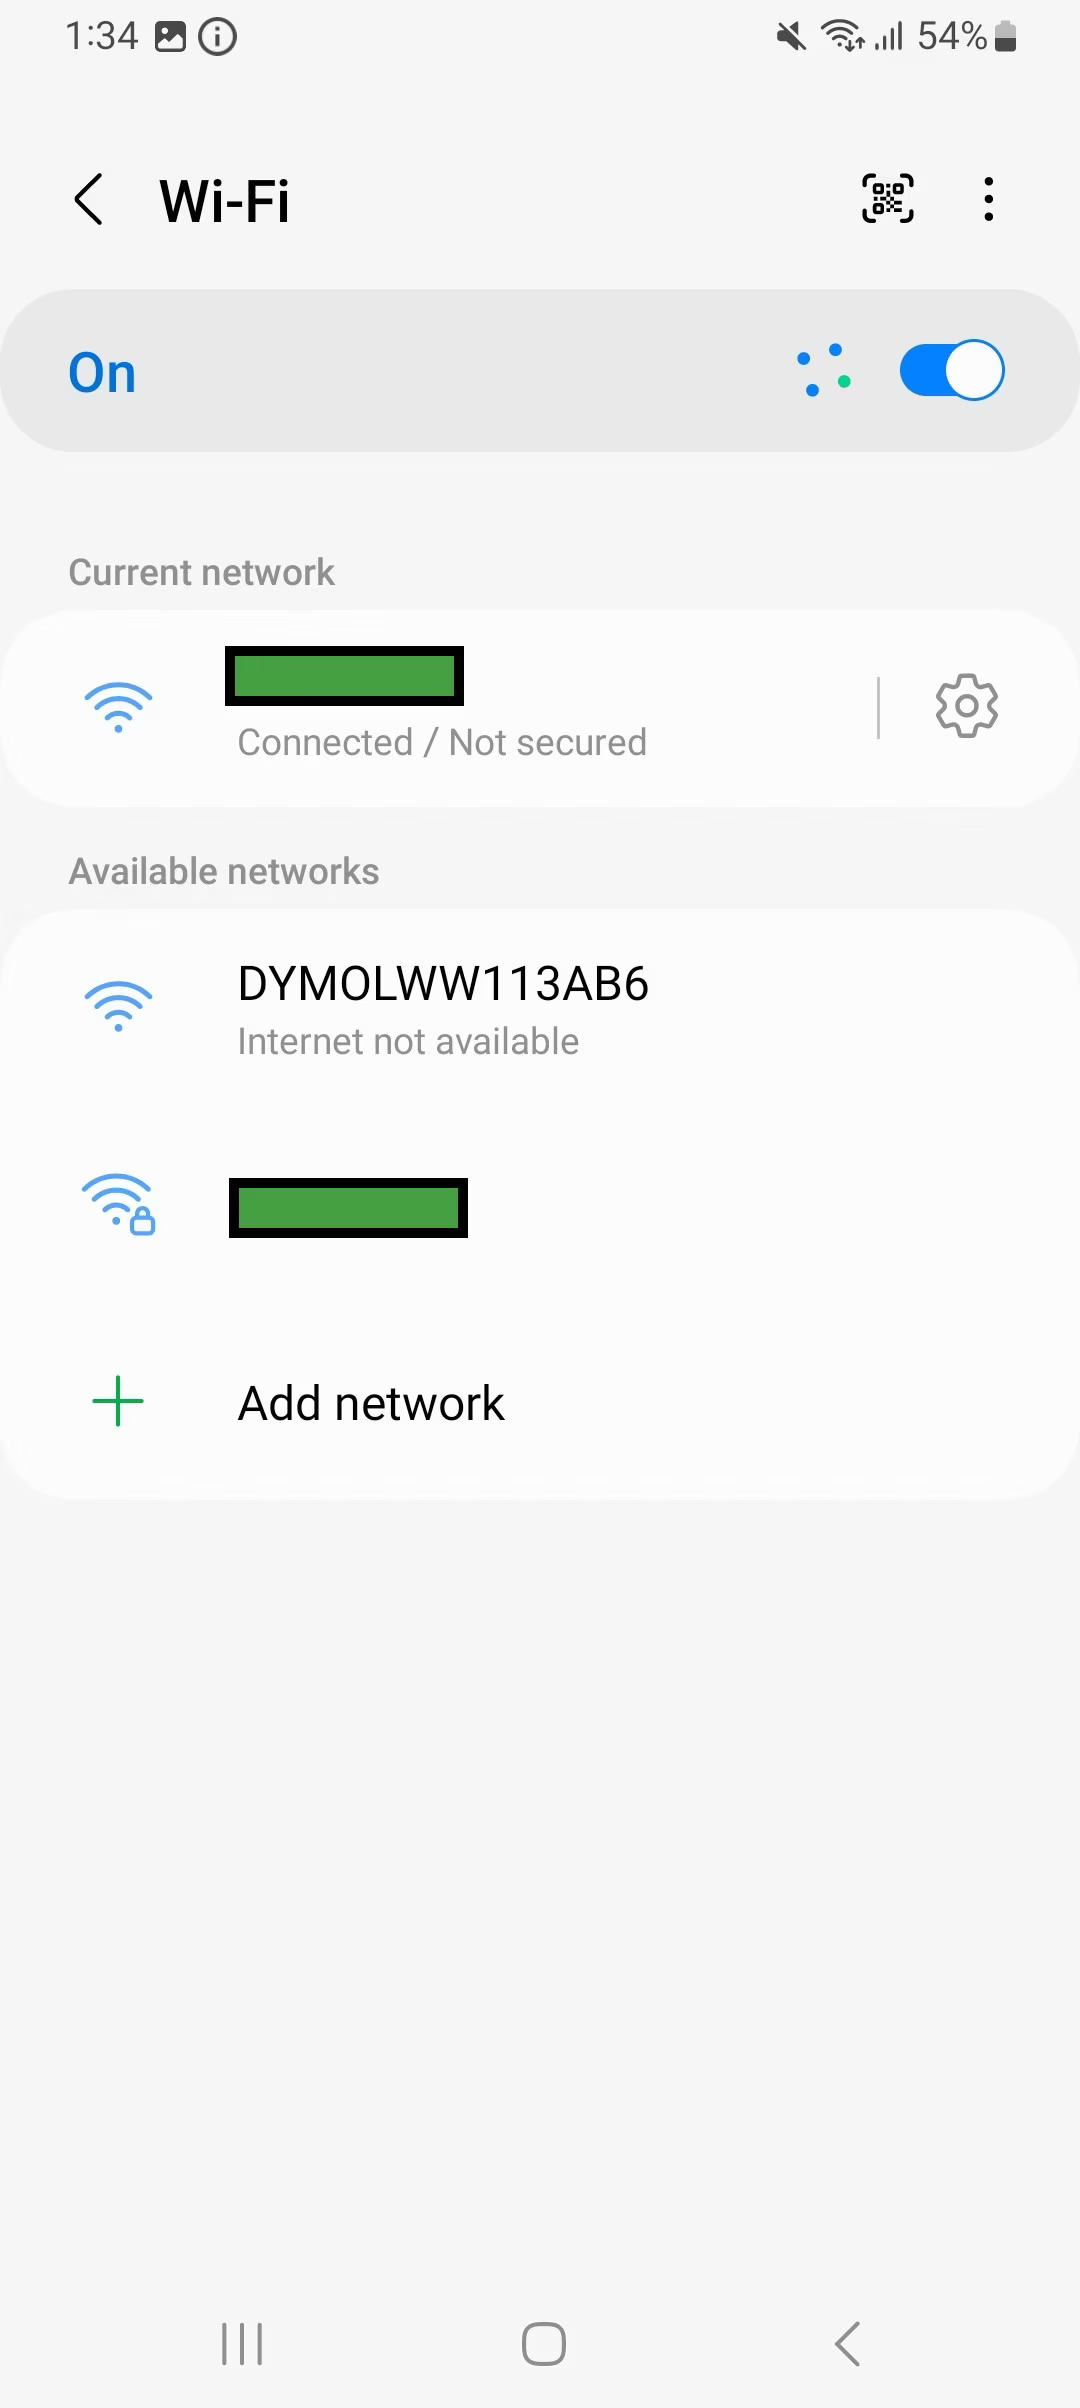
- Once you have properly set up you label printer, ensure that you are connected or paired to it, so you can add it to DYMO Connect Mobile. Please remember that the LabelWriter Wireless can use or the Access Point or be configured on your WiFi network. On the left picture, the mobile device is connected to the Access Point of the LabelWriter Wireless. On the right picture, the mobile device is connected to the WiFi network on which the printer was previously configured.
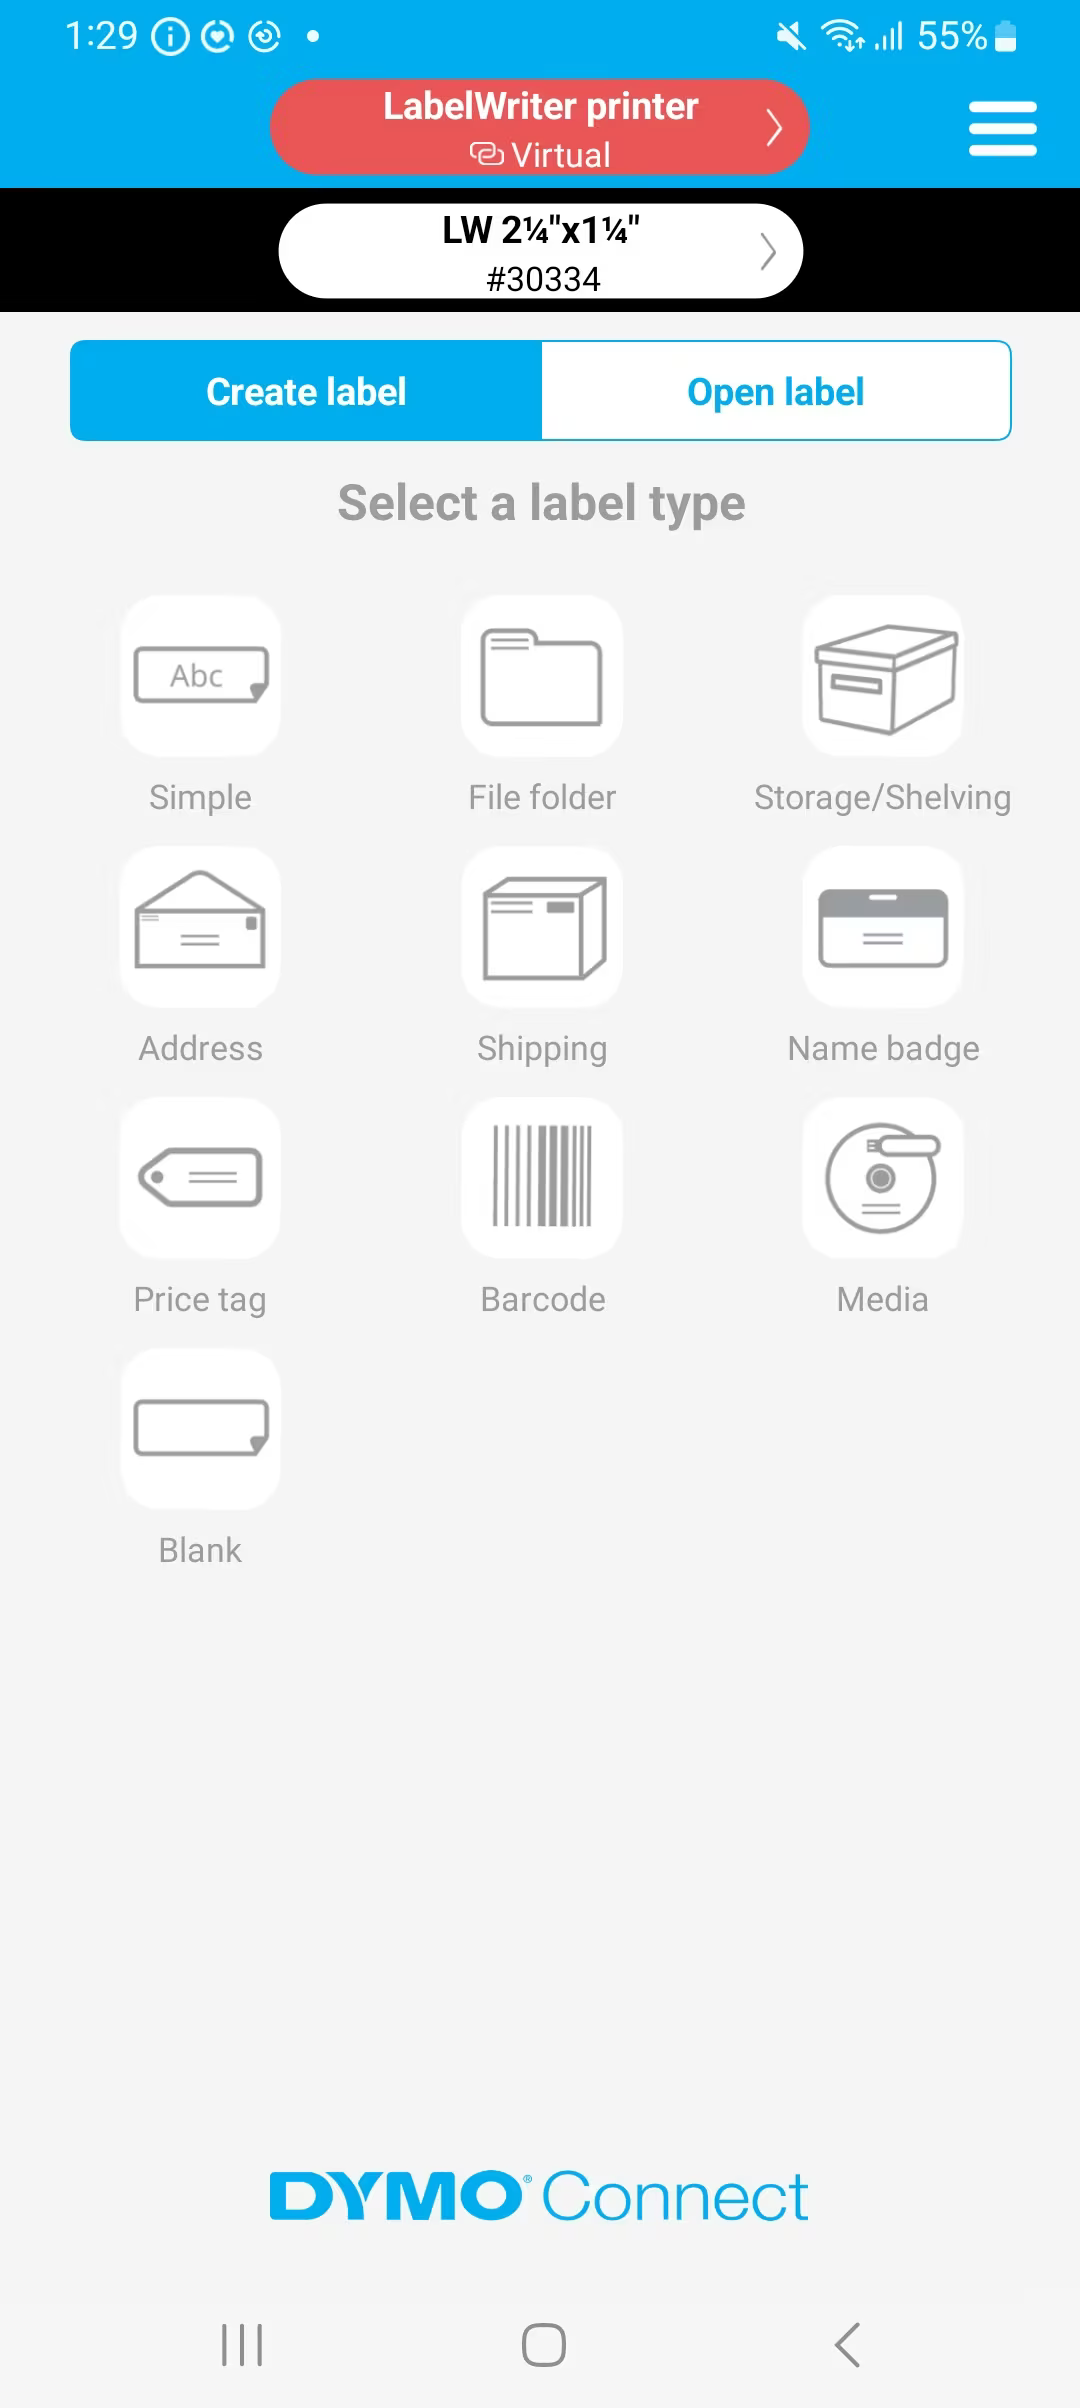
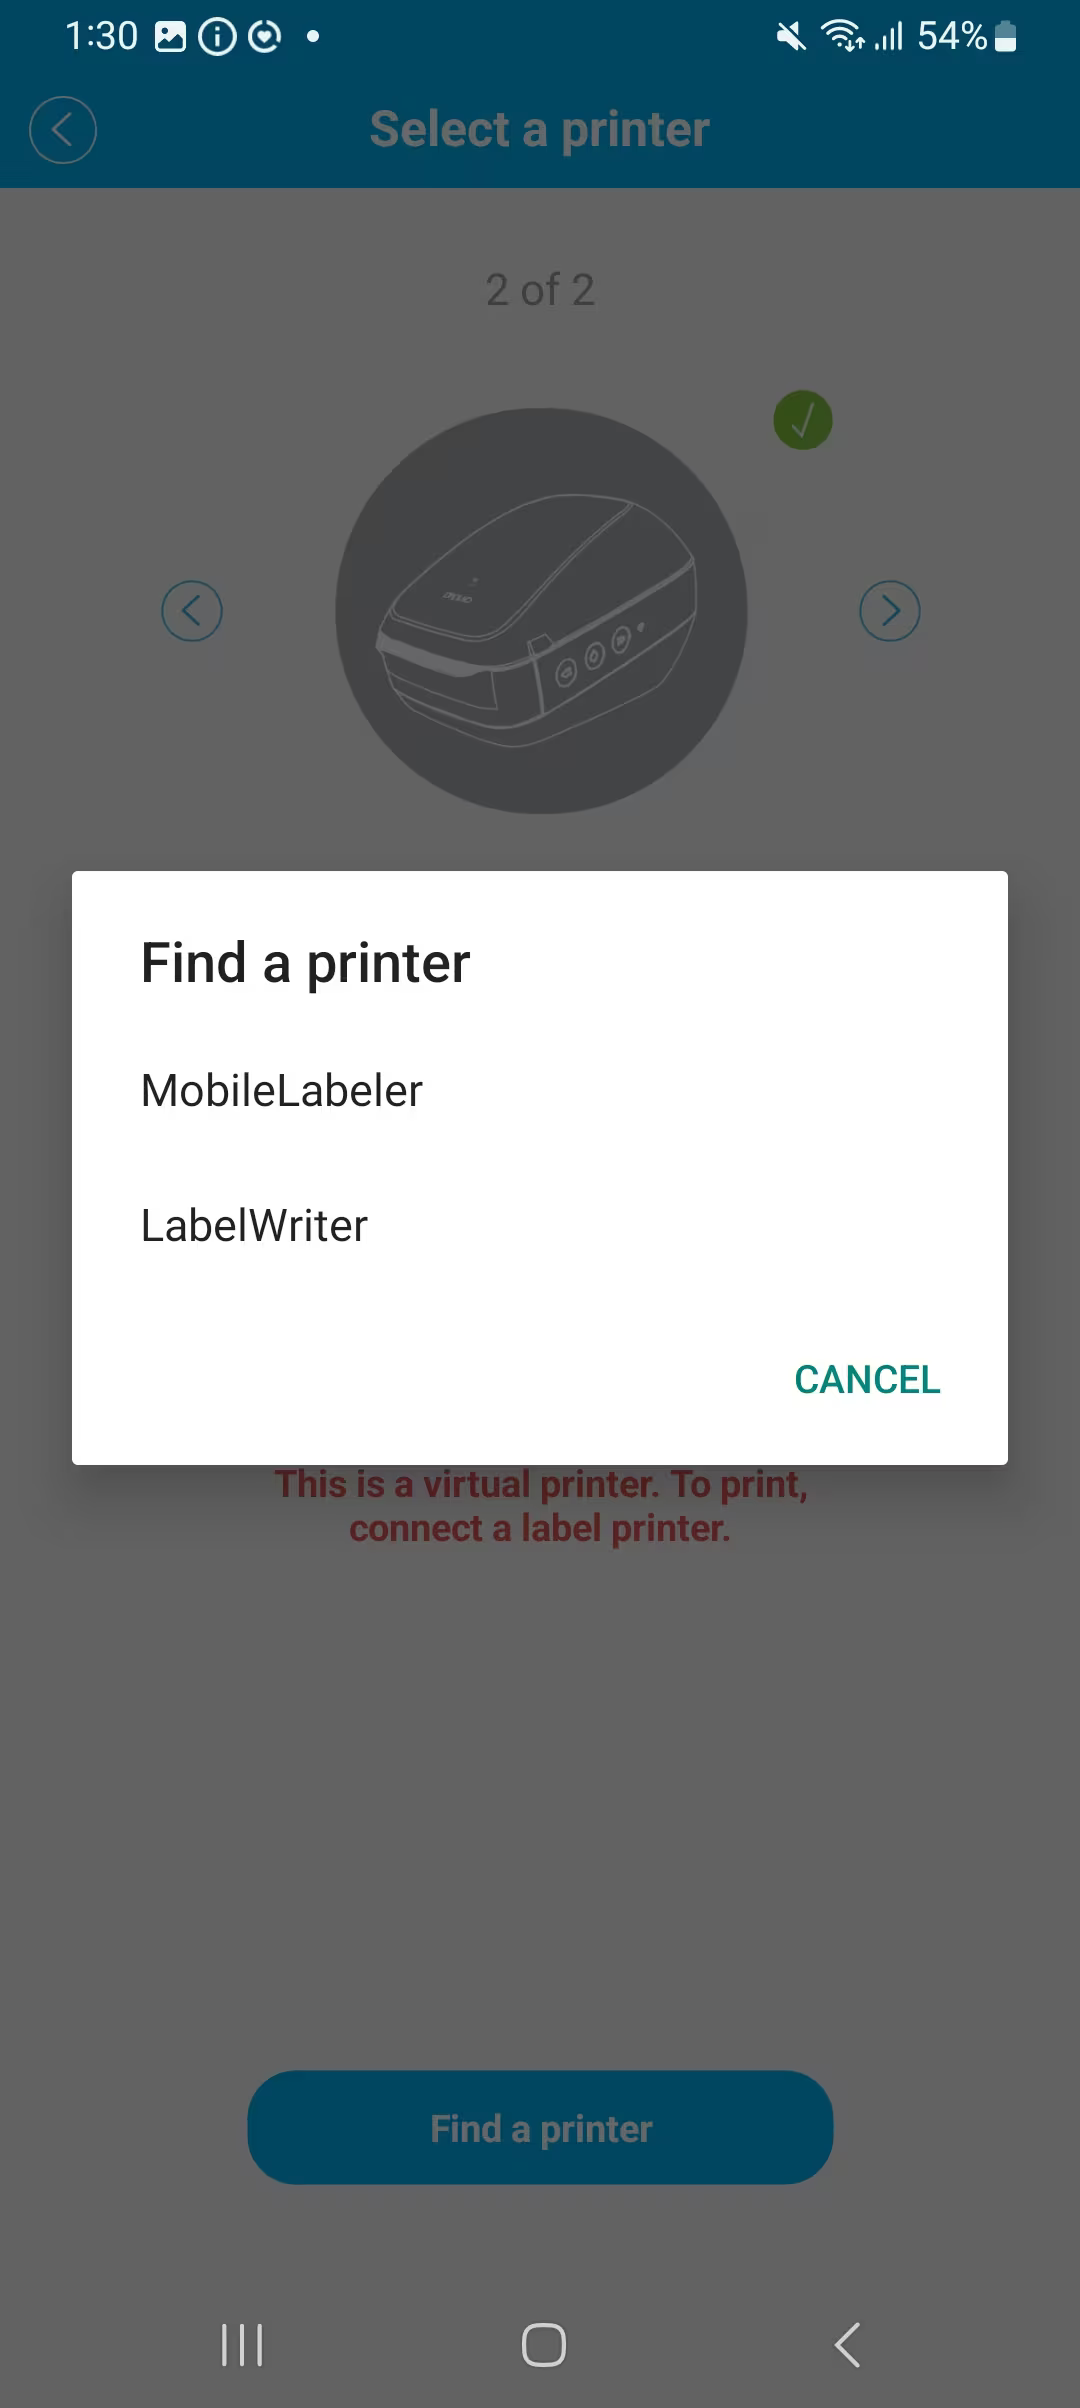
- Upon opening DYMO Connect Mobile you will see the Home Screen of your application as below. Here the LabelWriter printer is virtual, hence no printer has yet been installed. Click on the virtual device at the top of your screen to access the Add Network Printer utility.
- Click on Find printer in order to launch the utility and select which device type you would like to add. You may receive an additional window in which you need to select the exact device name.
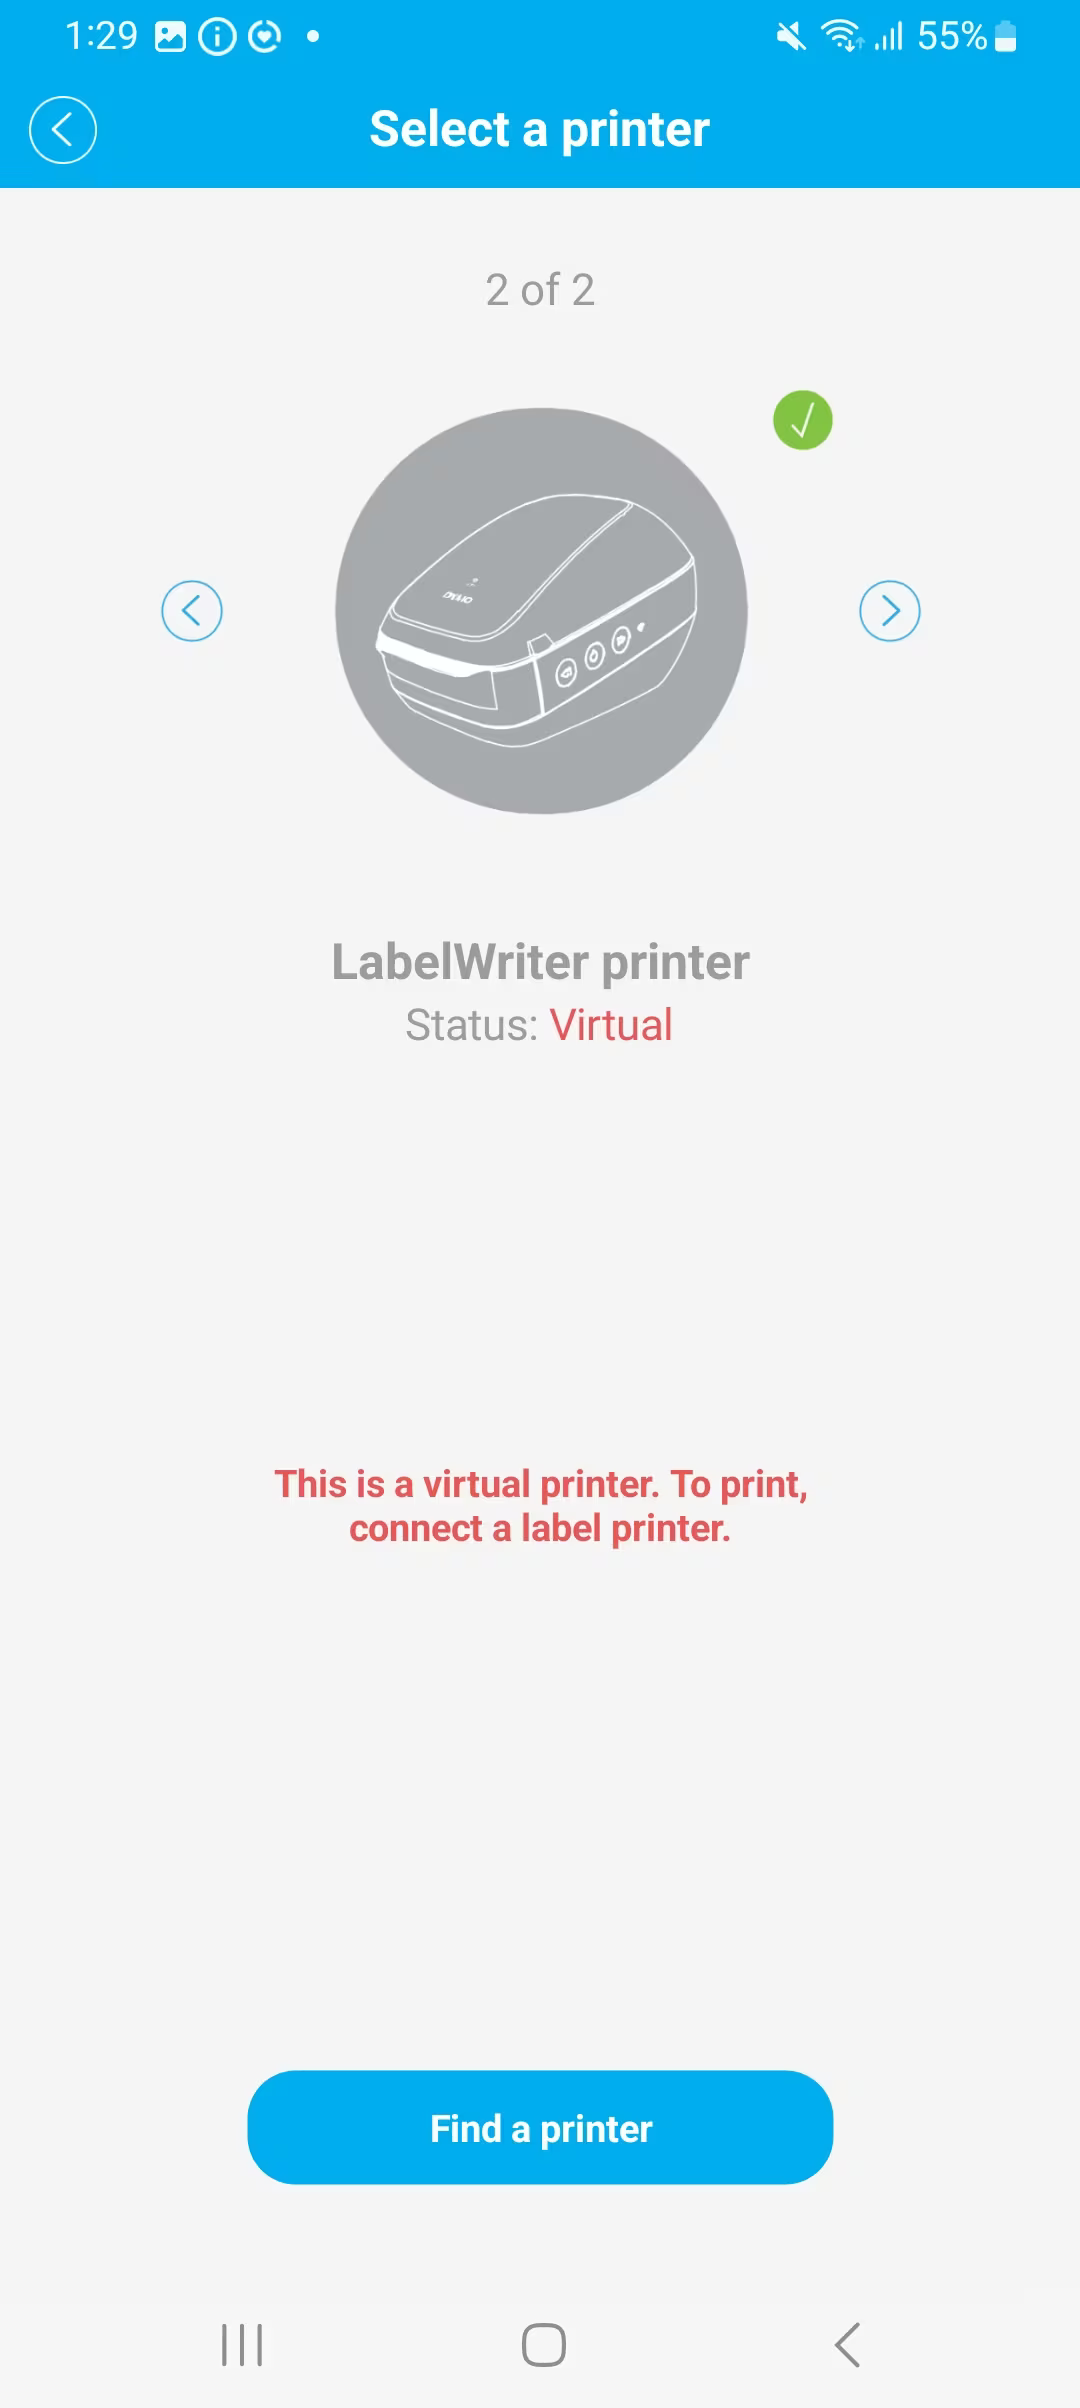
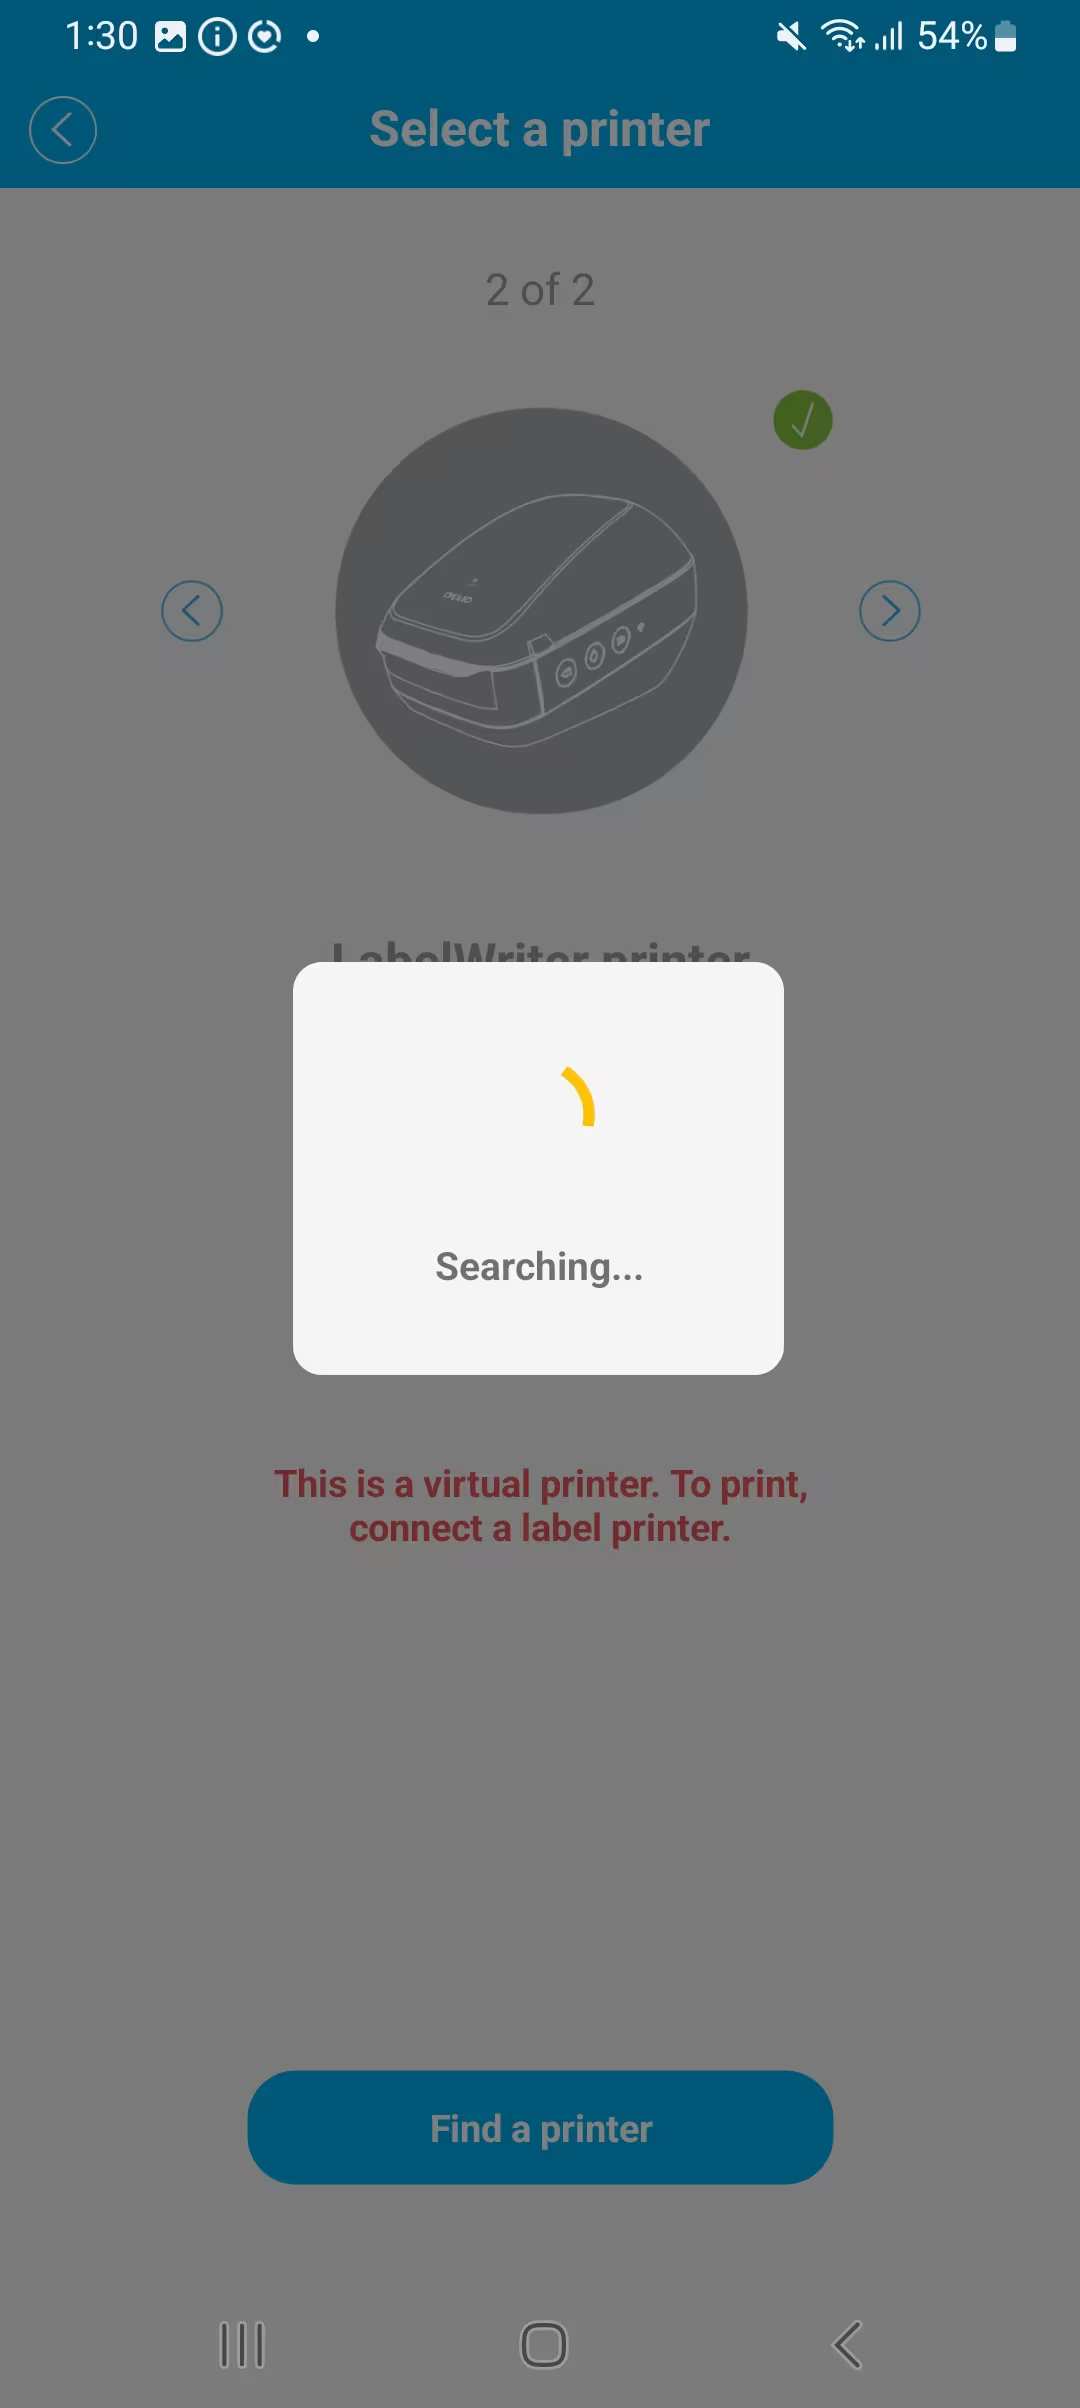
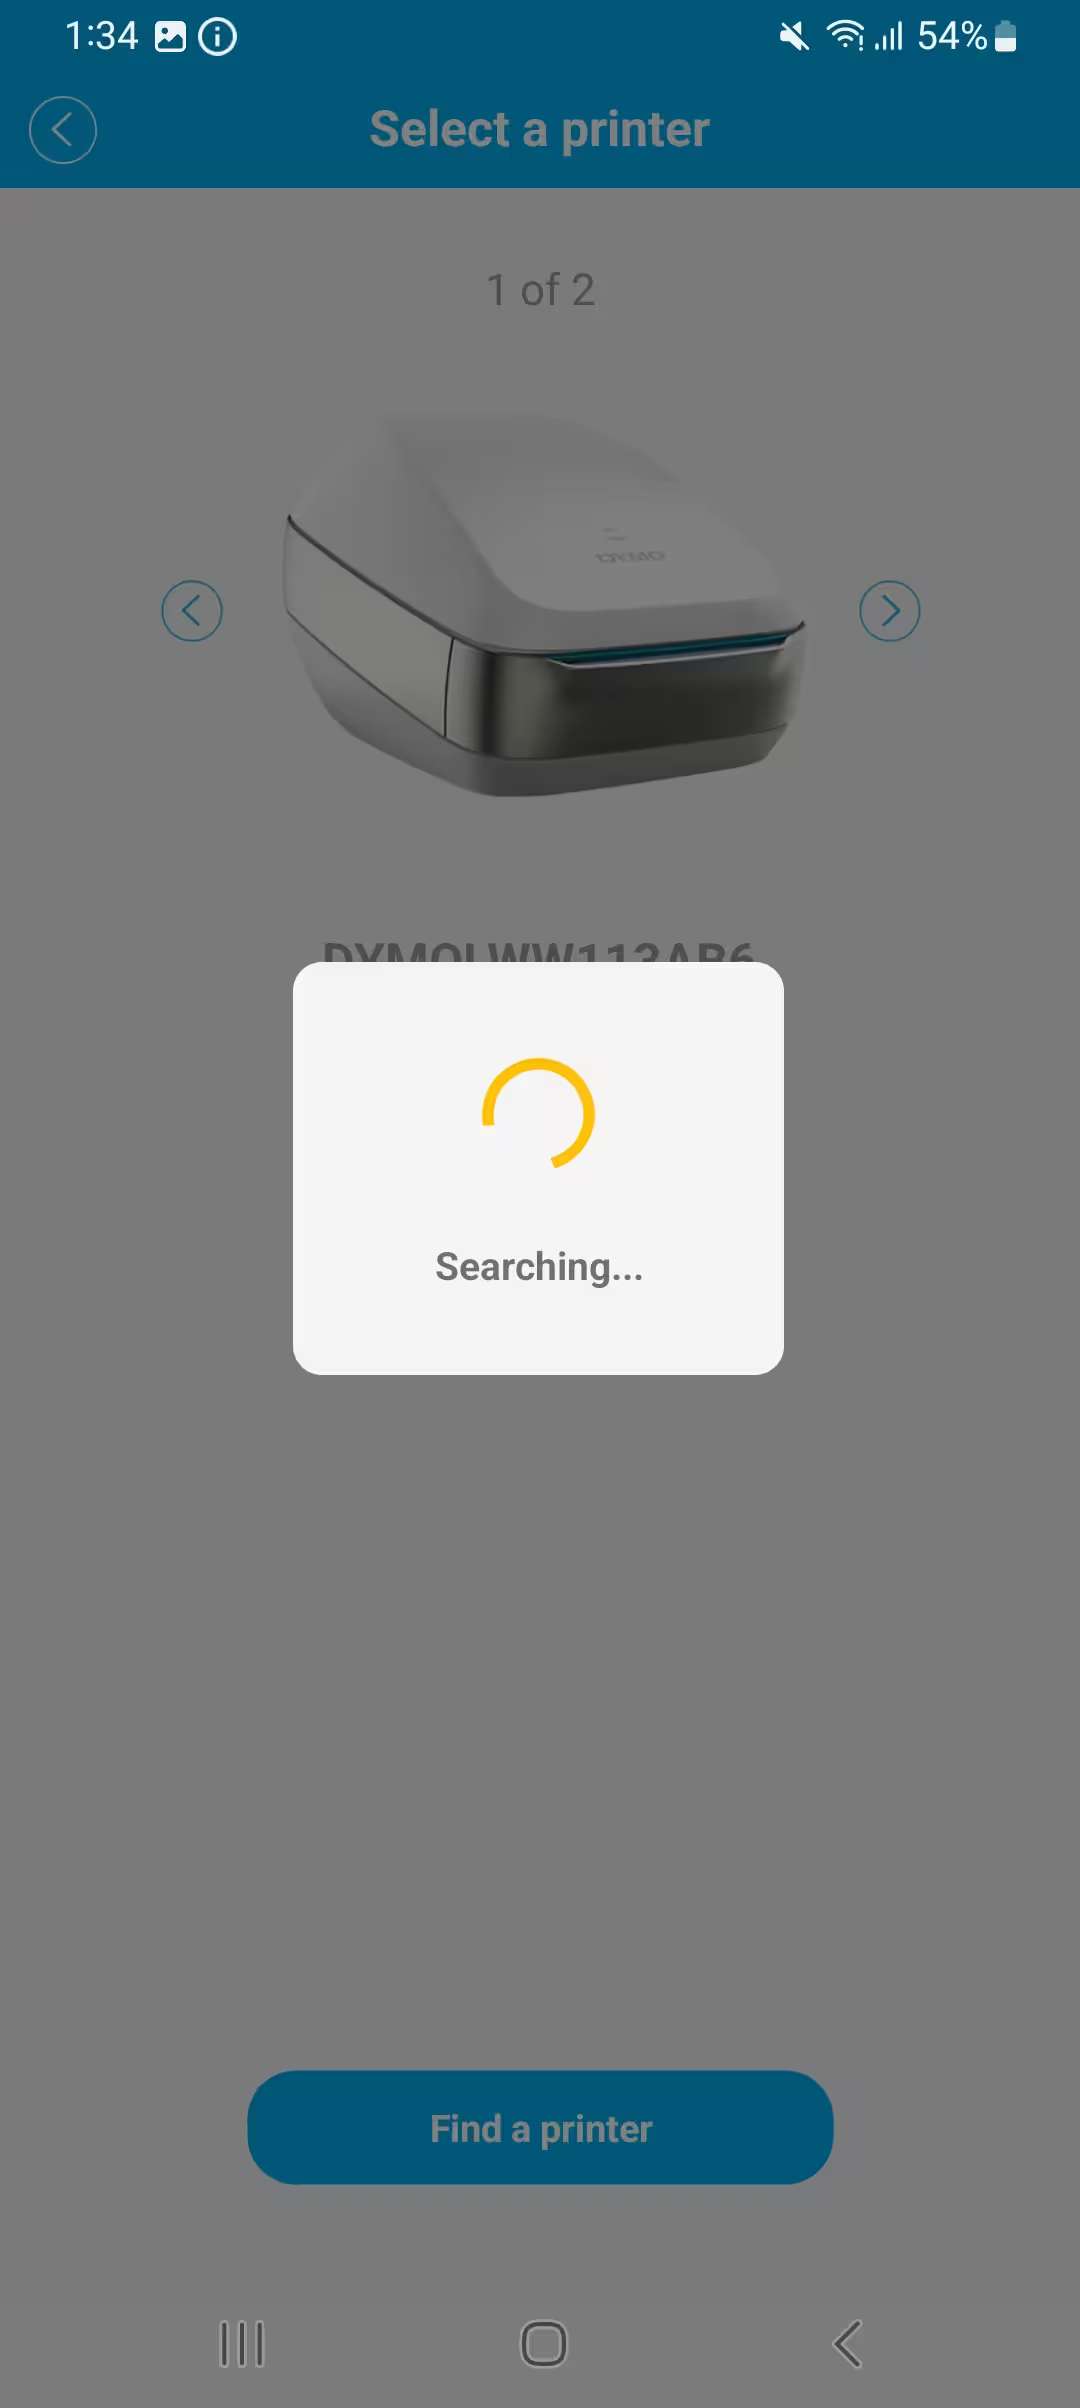
- The application will then install the printer. In the background you may see that the virtual logo changes into a device picture.
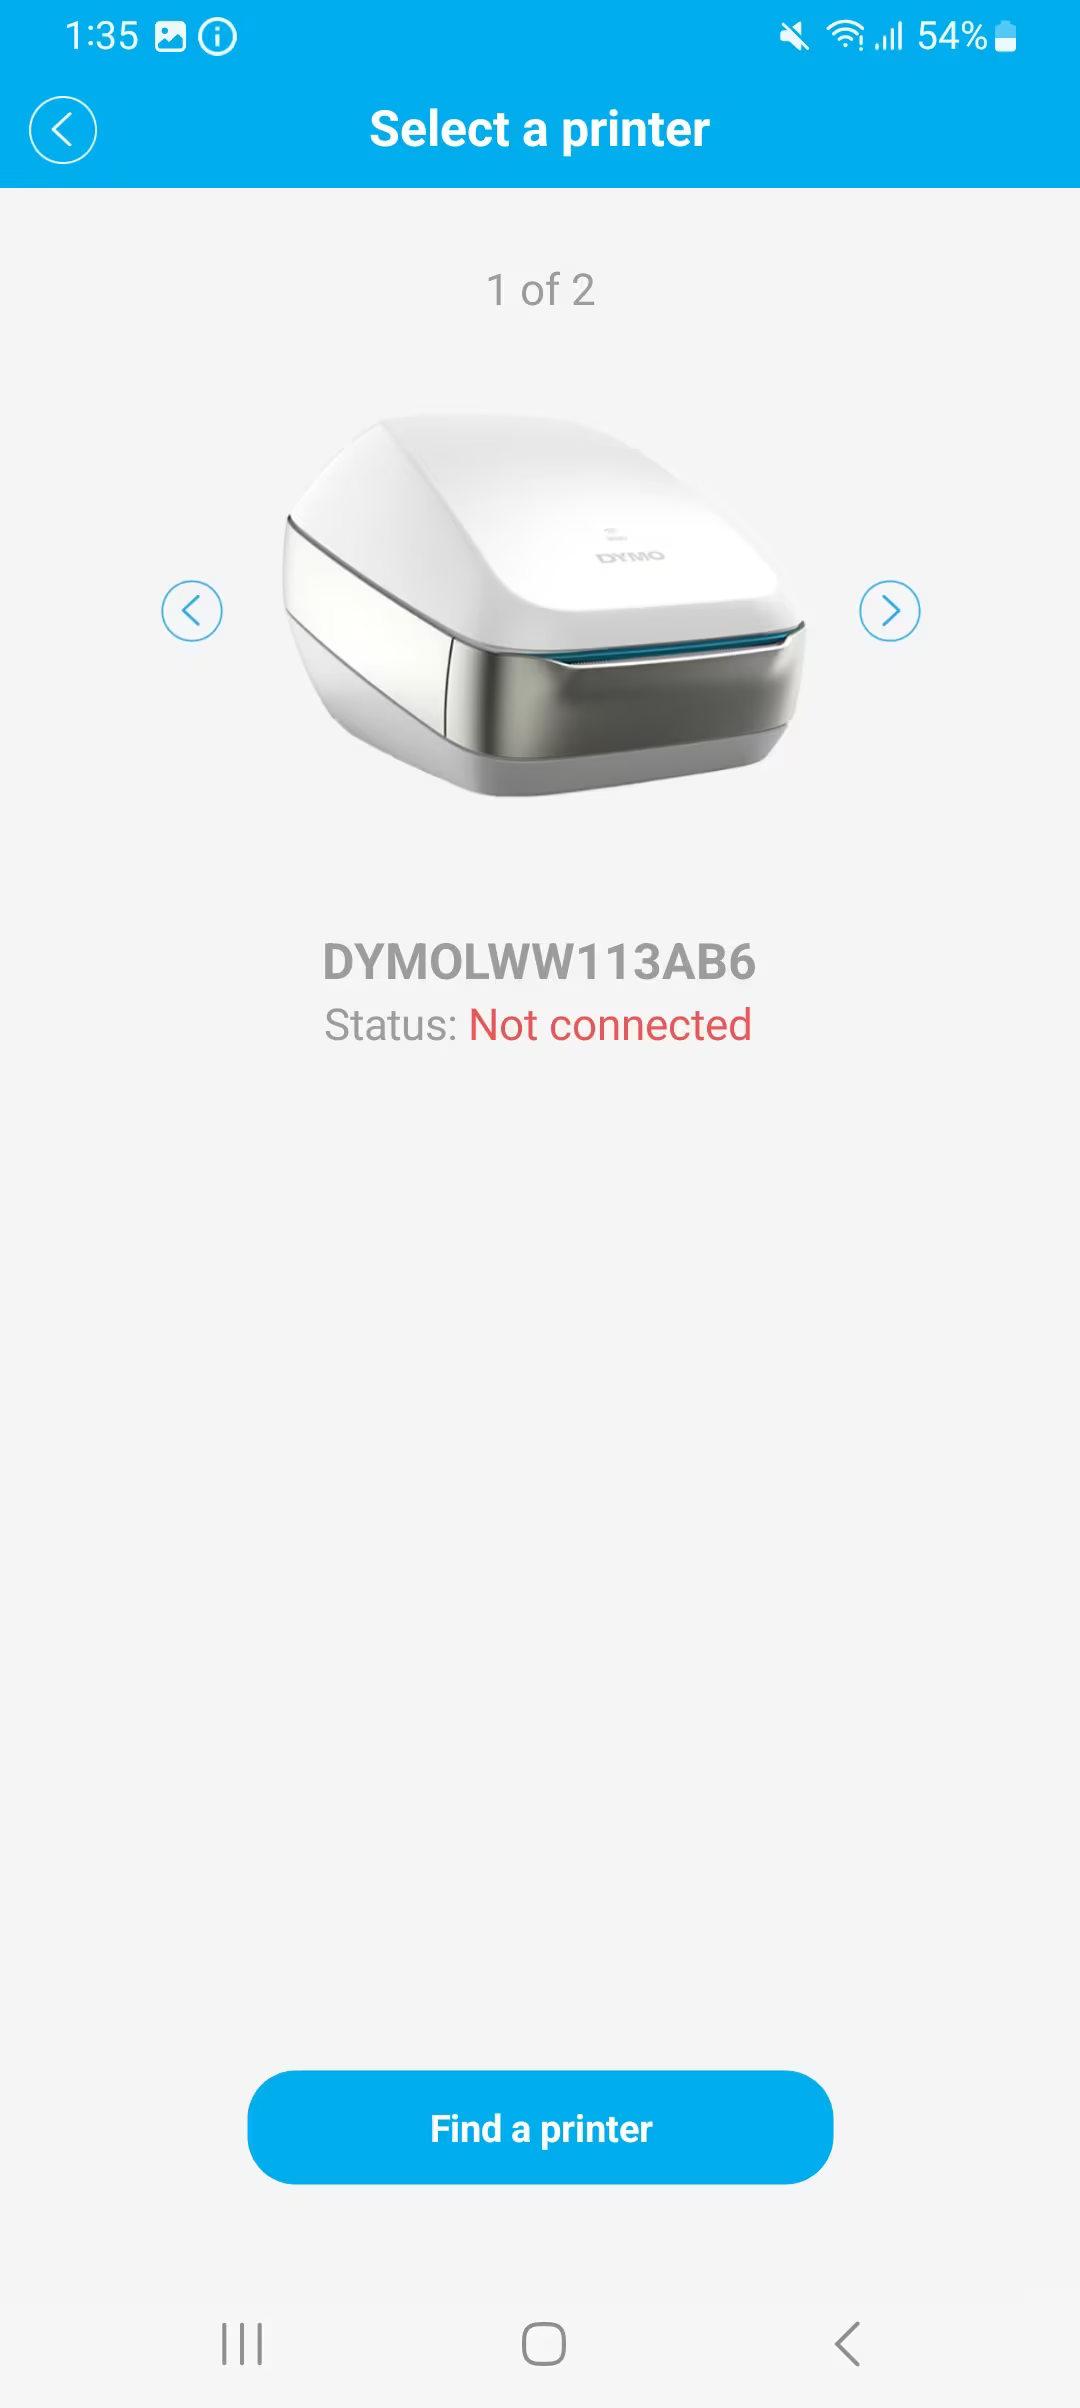
- Once your label printer has been installed, ensure that it is the active device indicated with the status Connected. You may have to click on the device on screen to make it your active device. Once the device has the status Connected, use the return arrow at the top left corner in order to return to the label template selection screen.
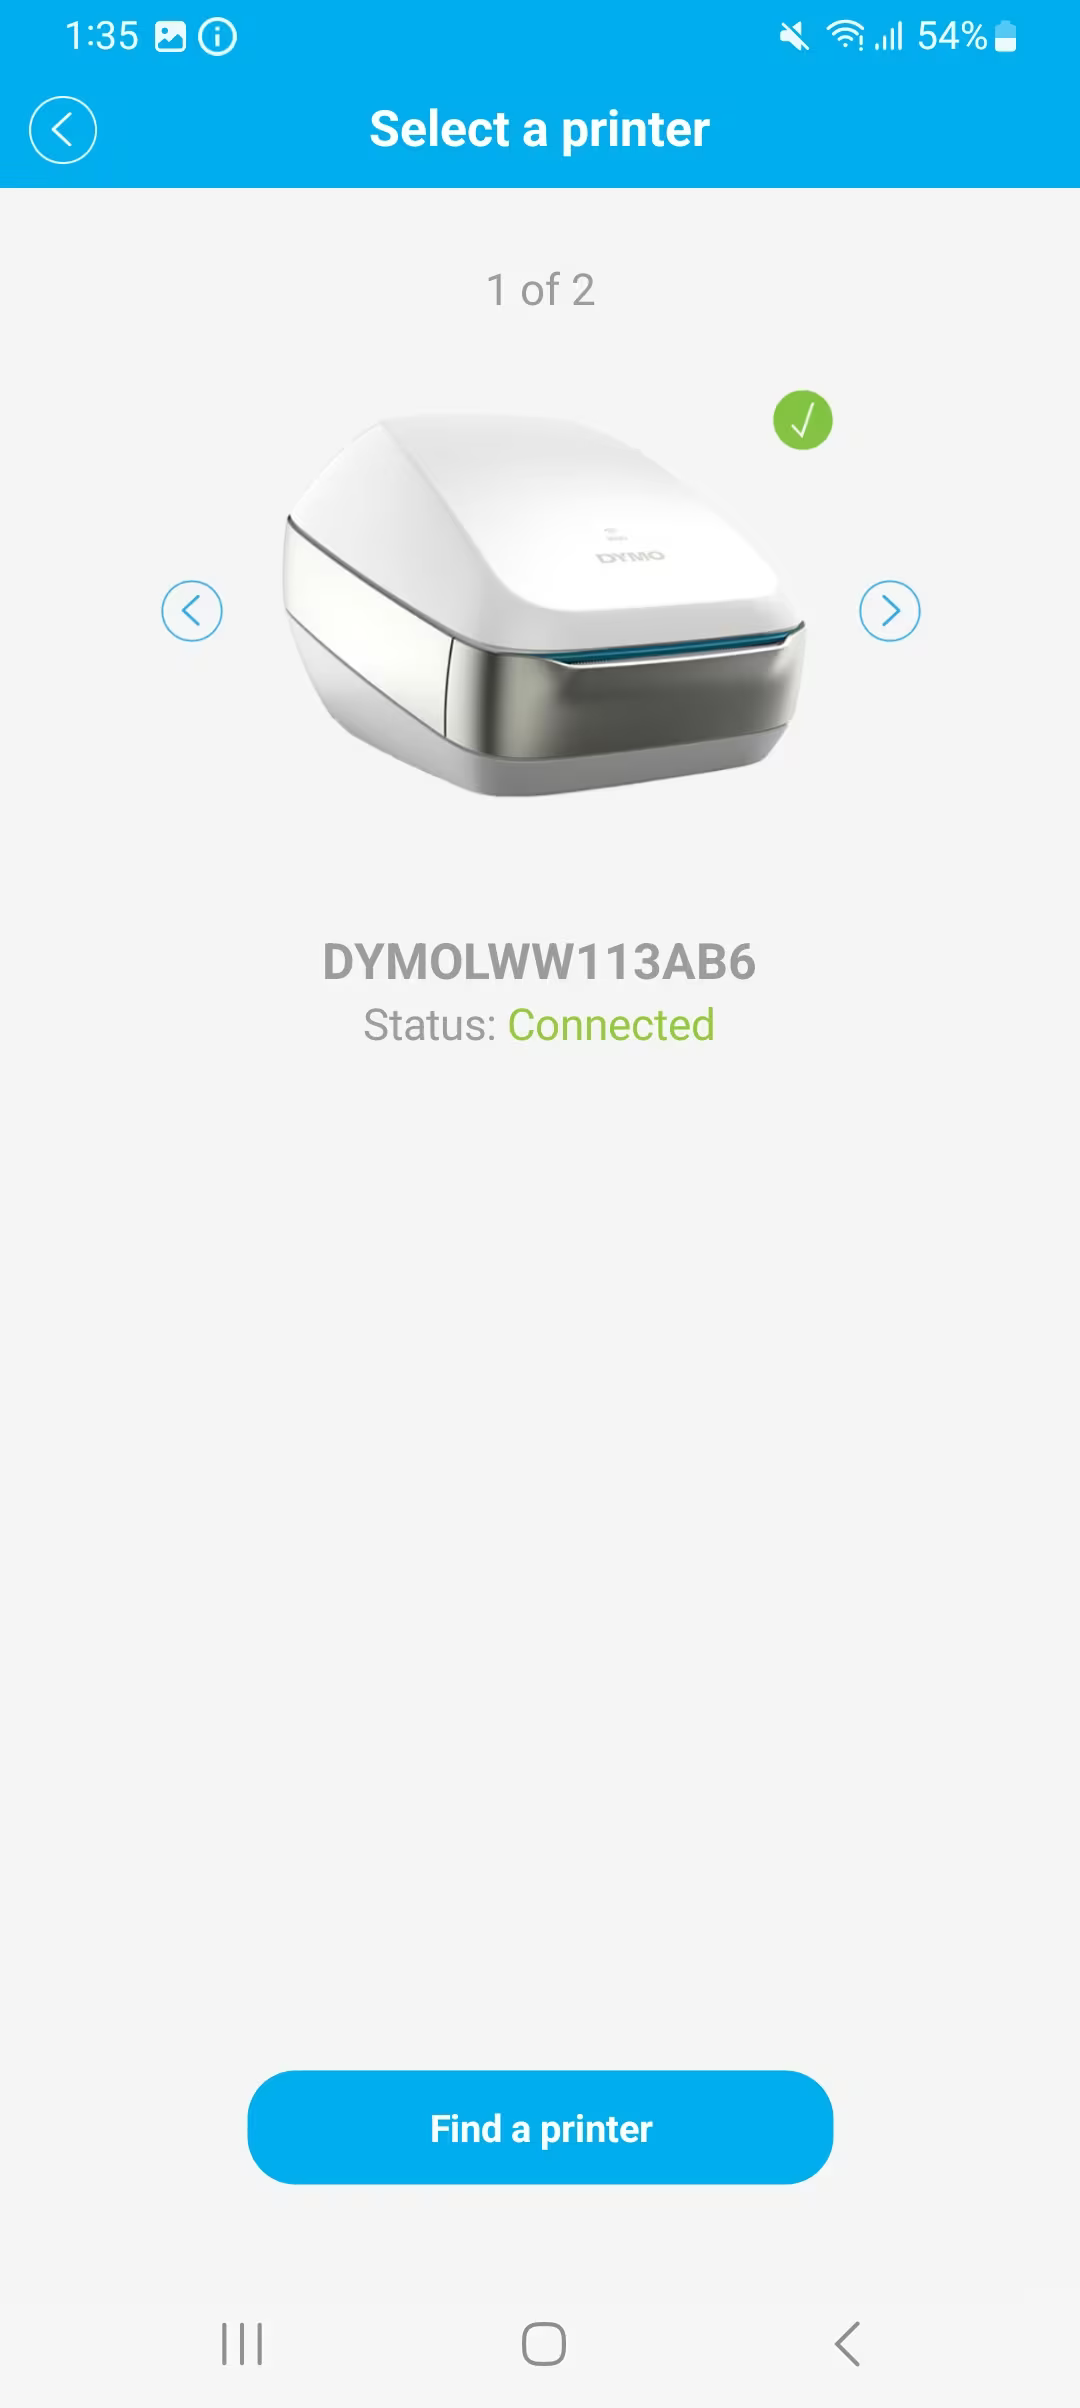
- Make sure the label size selected in DYMO Connect Mobile is the same as the one inserted in your label printer. If not, click on the label size at the top of the screen to access the label selection screen. Once the right label size is selected, use the return arrow at the top left corner in order to return to the label template selection screen.
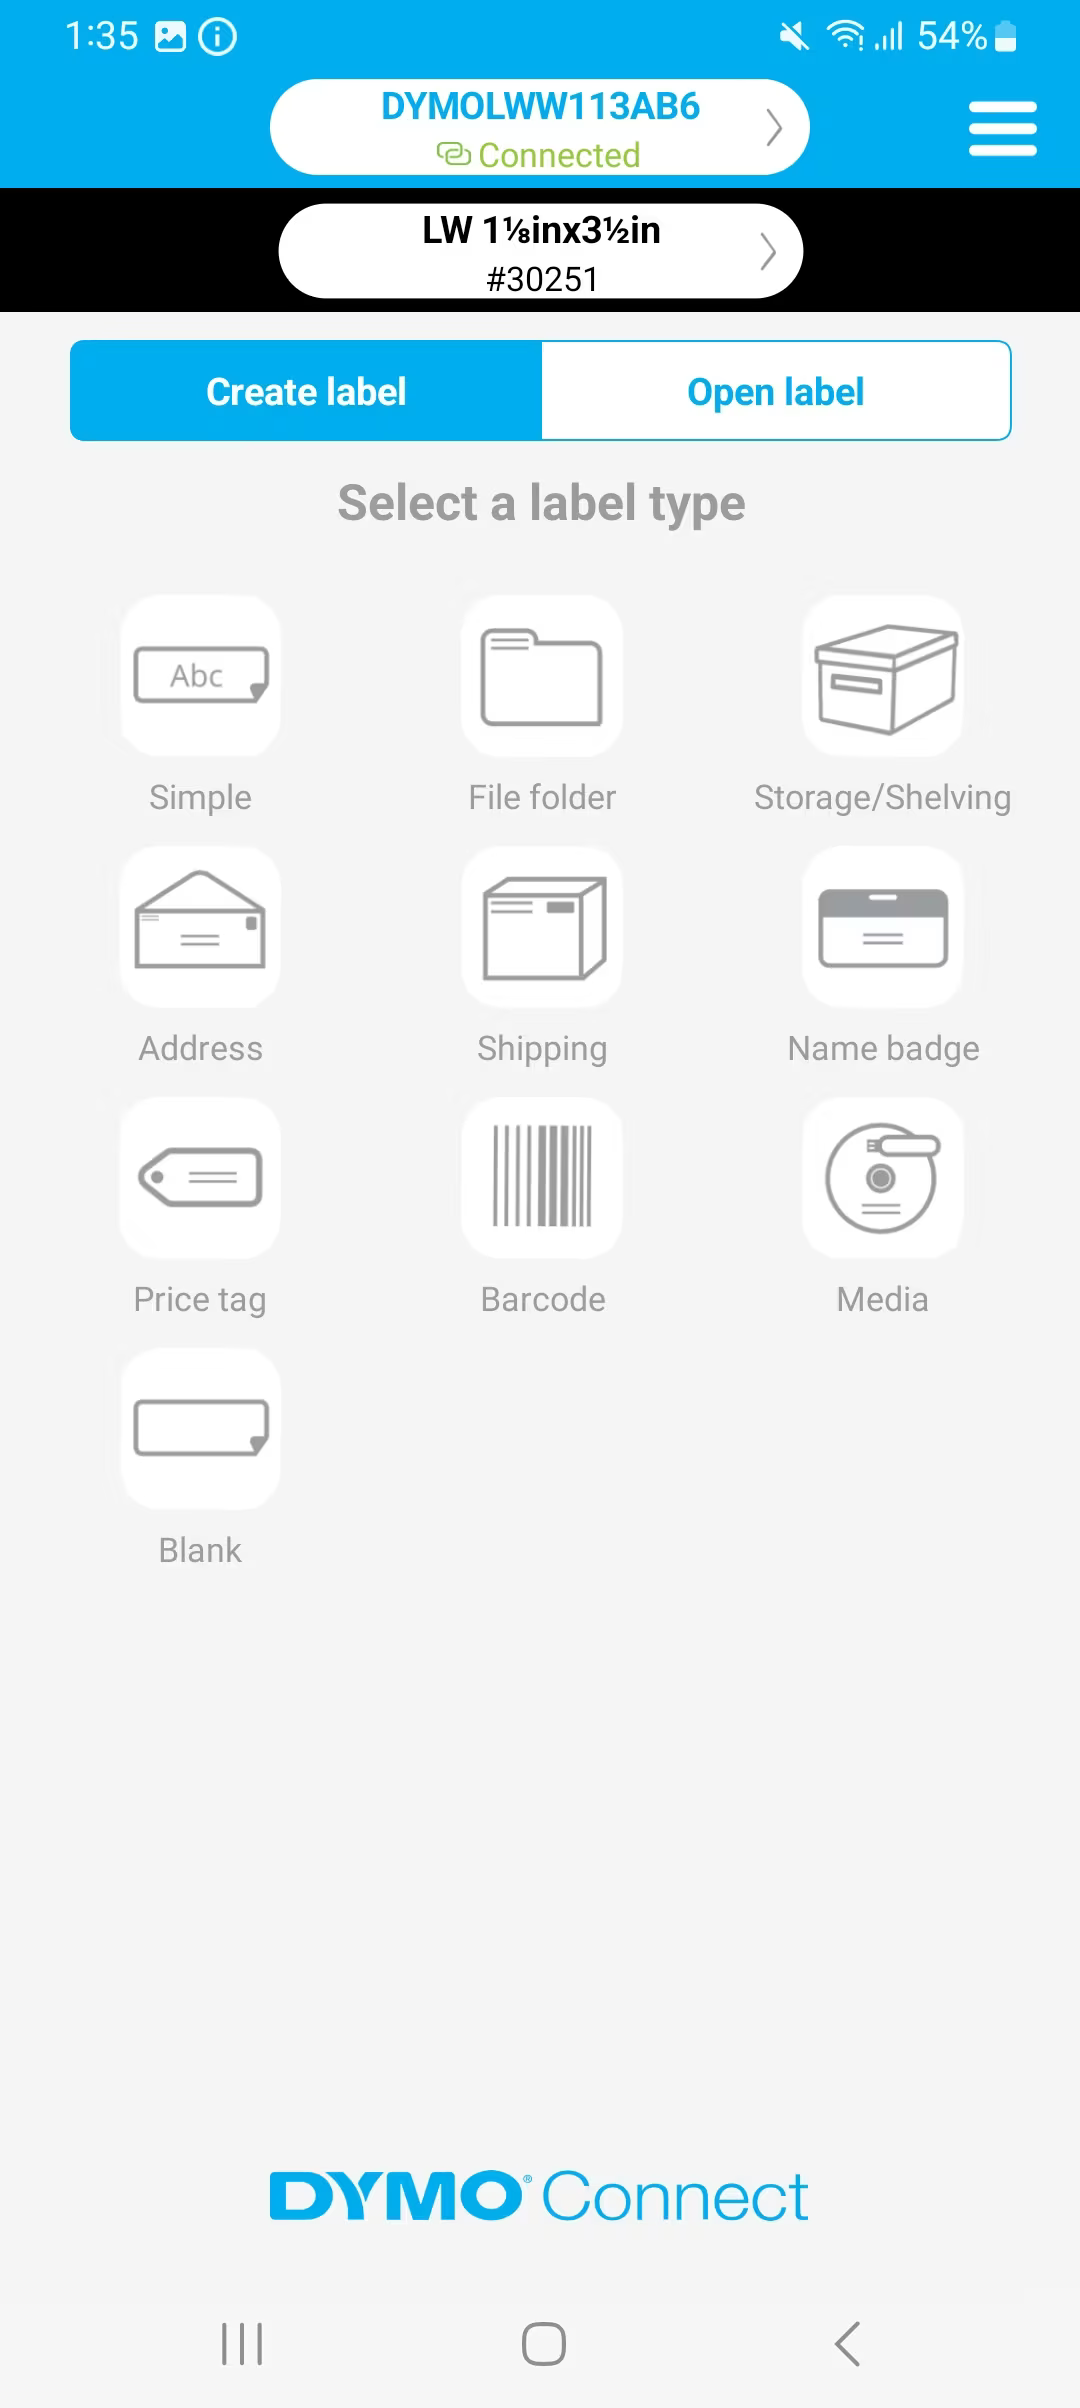
You have now successfully added you network printer to DYMO Connect Mobile. In order to find out more about designing Labels in the application, click HERE.
![]()