How do I print PDF documents with my LabelWriter?
Printing from a .pdf is a great alternative when encountering issues through popular platforms such as Amazon, Shopify, Shopkeep, USPS, etc. For example, Extra Large Shipping 4″ x 6″ labels from those services could be saved in A4 format which in return may cause issues to the alignment of the print-out. As each 3rd party platform is different, we are unable to support you by providing the appropriate setting selection. However, printing from a PDF document allows you to make some adjustments to make sure your label is scaled correctly.
Please select the method below:
DYMO Connect
Adobe Reader (Windows)
Preview (Mac)
Printing PDF documents with DYMO Connect
Our DYMO Connect software has the ability to import PDF documents allowing you to neatly design your label.
1. Please make sure that you have the latest DYMO Connect software installed.
2. If you have not already, please make sure your .pdf file is located on your computer.
3. Open DYMO Connect.
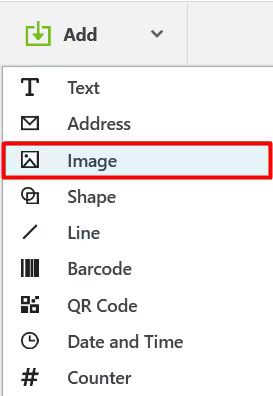
4. Add an Image object to your label using the ADD button.
5. Select the image object on the label.
6. On the left hand side, select Browse.
7. Navigate to your .pdf document and select it.
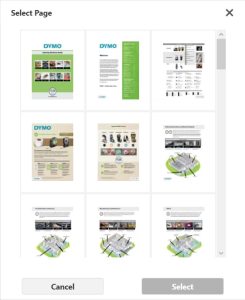
8. Select the page you would like to import.
9. Rotate the image using the button in the top right corner.
10. Crop the image so that only the area you wish to print is included.
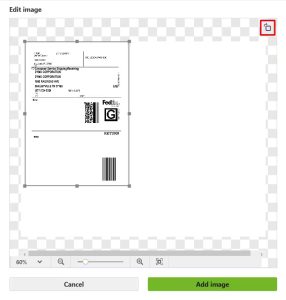
11. Select Add image.
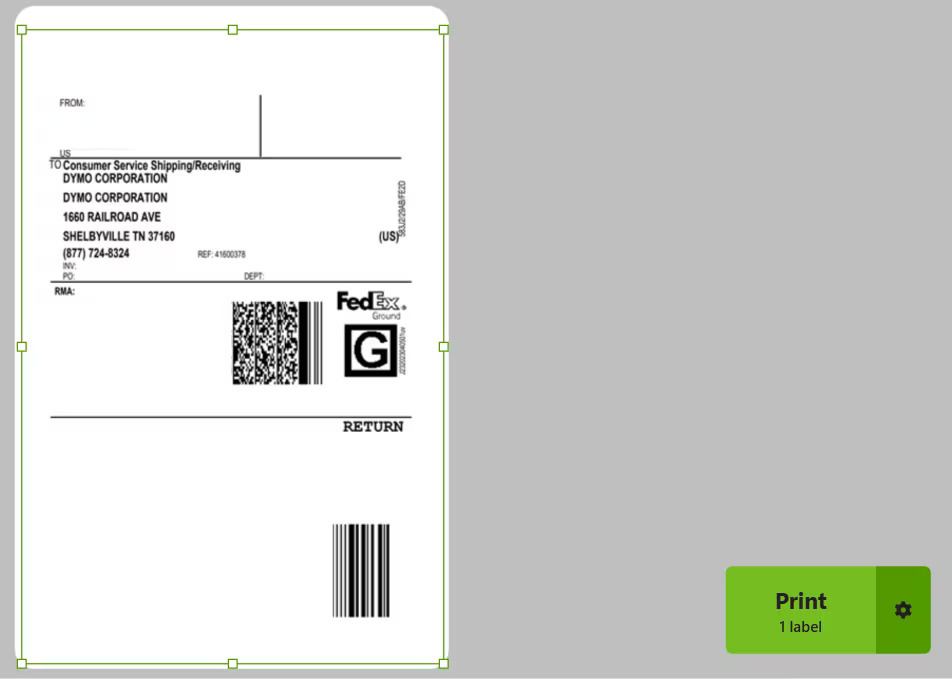
12. Scale the image to fit your label and print.
Printing PDF documents on Windows
1. Please make sure that you have Adobe Acrobat downloaded and installed on your computer. If not, please download it for free from here: https://acrobat.adobe.com/us/en/acrobat/pdf-reader.html
2. Save the generated label as a .pdf file onto your computer.
3. Open the label in Adobe Acrobat Reader.
Adobe Acrobat Reader has recently updated its layout and so the steps may have some minor differences depending on the version you are using. Below you can find the steps for both layouts.
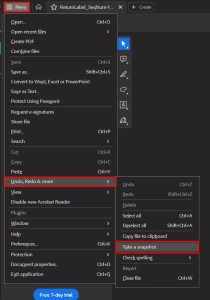
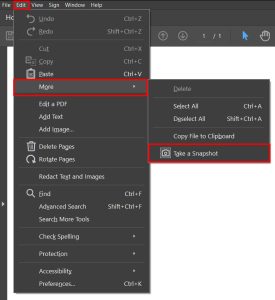
4. In Adobe Acrobat Reader go to Menu, then Undo, Redo & more and select ‘Take a Snapshot’, or go to Edit, then More and select ‘Take a Snapshot‘ if you are using the older layout. Please see the examples below:
New Layout
Old Layout
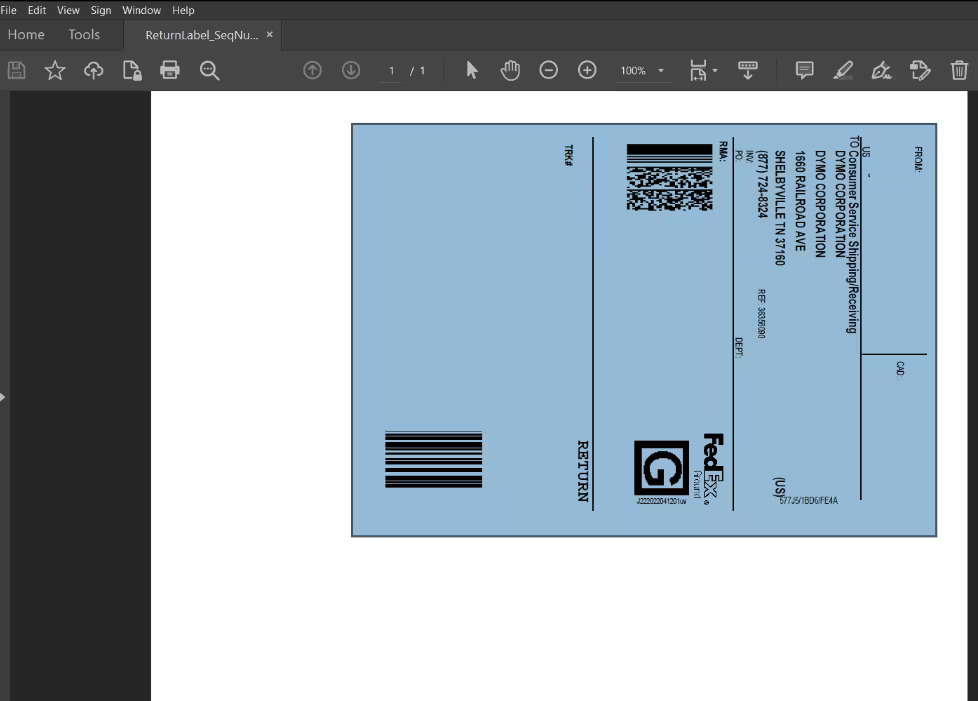
5. Hold your left mouse button and drag to highlight just the label you are trying to print. Once selected, it should look like in the picture below.
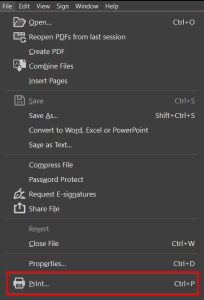
6. After selecting the label, go to Menu and Print or if you are using the older version, go to File and Print. Please see the examples below:
New Layout

Old Layout
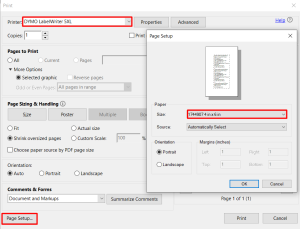
7. In the print menu, make sure you have the correct printer selected. Go to Page Setup and change the paper size to the label which is inserted into your printer. Finally, press OK.
Please note: the label reference number can be found on the backside of your labels.
8. After those steps, you will see the preview on the right. You can change the scale of the picture. Check the preview for an indication of how the label will be printed.
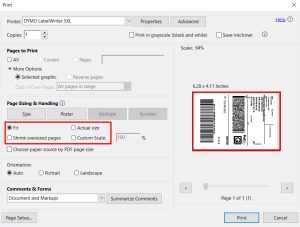
9. Print the label by pressing the Print button and check the result.
This method can be used for any DYMO printer and for any other label size whenever there is a possibility to save the label in a PDF format.
Printing PDF documents on Mac
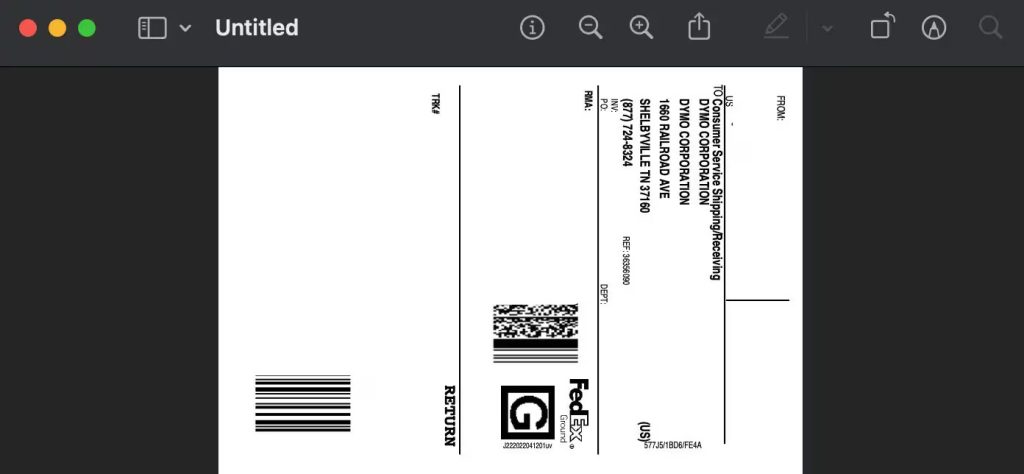
1. Mac computers have a built-in PDF viewer called ‘Preview’. Right-click on your downloaded label and select Open with > Preview.
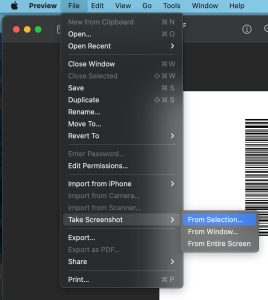
2. In Preview, go to File, then Take Screenshot and select From Selection.
3. Hold your left mouse button and drag to highlight just the label you are trying to print. See the image below for an example.
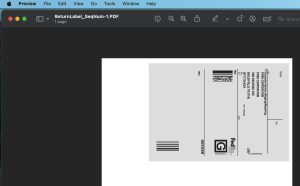
4. Once highlighted, the label will open in a new window. It should now be resized with the white area excluded.
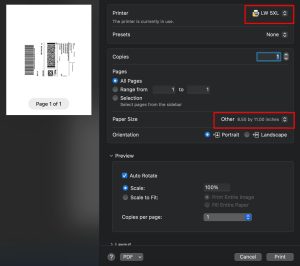
5. With the new label selected, go to File and select Print. The print dialogue window will appear where you need to make sure the correct settings are selected. Please start by making sure the correct printer is selected. Then proceed to change the paper size.
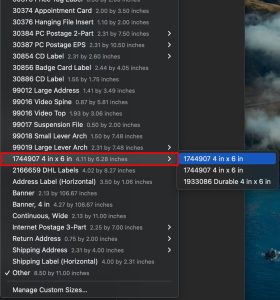
6. From the list of label sizes, please select the label which is currently inserted into your printer. In this case, we are selecting the 4″ x 6″ label size.
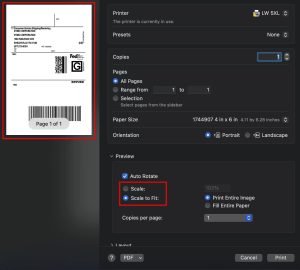
7. Make sure that you have the scaling set to Fit. This will ensure that your print is not cut off from the edges of the label. Please see the preview on the left-hand side to see how the label will print. If everything is checked, please select the Print button.
This method can be used for any DYMO printer and any other label size whenever there is a possibility to save the label in a PDF format.
![]()